Silent Holy Night Card
Posted by Rajni Chawla
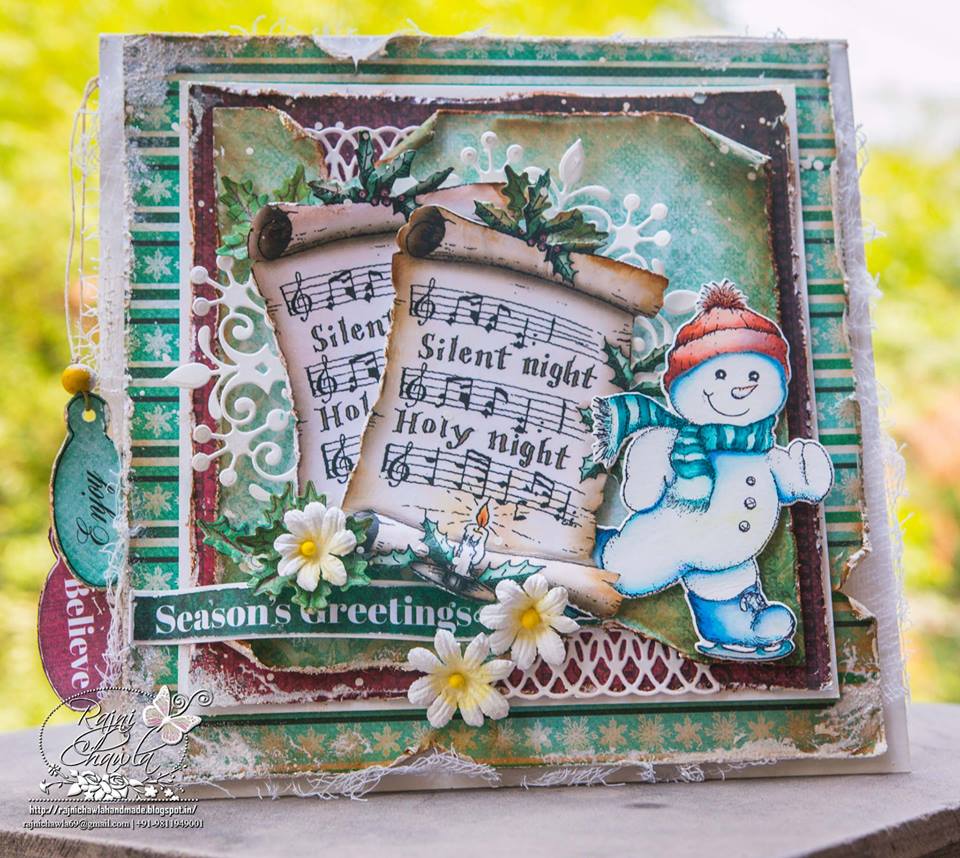
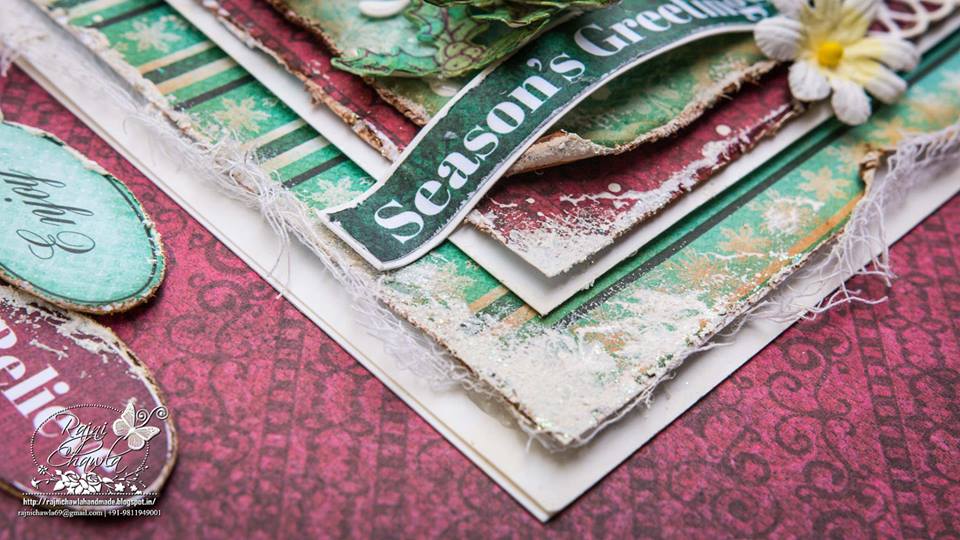
Good morning friends and welcome to another Heartfelt Creations Wednesday. We are showcasing Snow Kissed Collection these days. i am sharing a Silent Holy Script Card today.
Products from Heartfelt Creations :
Border Essentials Die HCD1-783
Delightful Daisy Die HCD1-760
Celebrate the Season Die HCD1-7106
Celebrate the Season Cling Stamp Set HCPC-3747
Snow Kissed Flakes and Tag Die HCD1-7108
Frolicking Frosty and Spruce Die HCD1-7107
Frolicking Frosty Cling Stamp Set HCPC-3750
Snow Kissed Paper Collection HCDP1-269
Designer Dries Clear Adhesive 159723
Crystal Ultrafine Transparent Glitter
Double Dots 100pc. -3D Foam Circles DDOTS
Glue Tip Pins PIN6
Other Products: Vintage Photo Distress ink, Smooth white card stock, distressing tool, scoreboard, Zig Clean Clear marker brush markers ( 030 , 034, 031, 033, 060, 065, 061), black archival ink, Library green archival ink, Peeled paint distress ink.
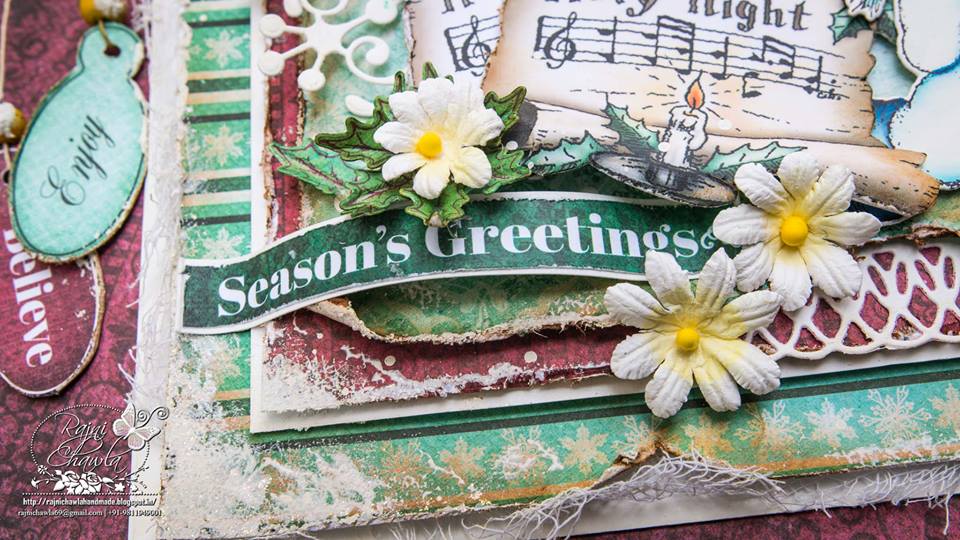
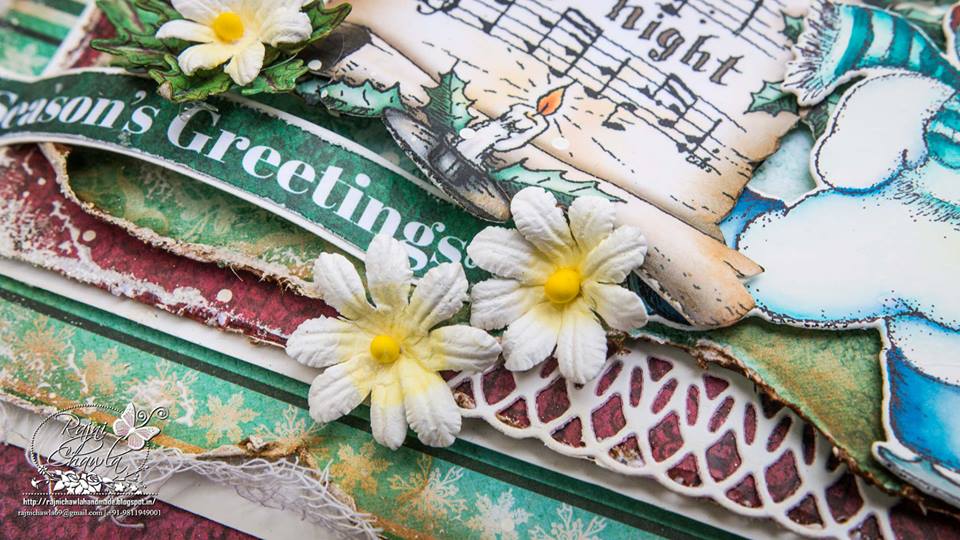
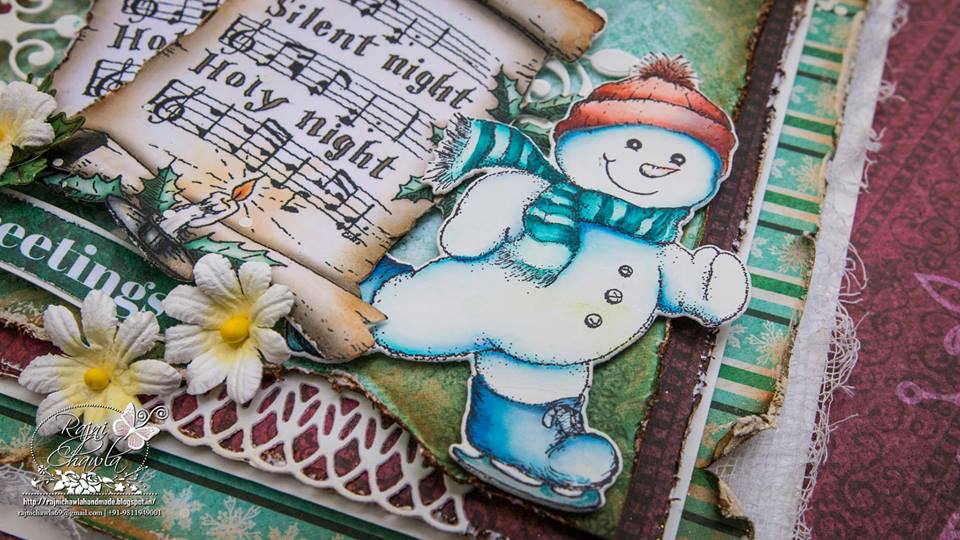
Instructions: The card front measure 6" by 6 ". Cut the designer paper and distress the edges using distress tool. Further distress all the edges with Vintage photo. Layer it on dark color designer sheet and mat them on smooth white cardstock. Create few more layers using the same designer paper and prepare the top fold card base which measures 7" by 7". All the layers are distressed using vintage photo and then glittered using clear glitter with the help of adhesive which dries clear. The frosty snowman is stamped with black archival and coloured using zig markers. The holy night pattern is fussy cut from the designer papers of the same collection. Holy leaves are from Celebrate the Season Cling Stamp Set and cut from its coordinating Celebrate the Season Die. These are first stamped with Library Green archival ink and then colored using peeled paint distress ink. Two snowflakes are cut using Snow Kissed Flakes and Tag Die and layered under Holy script. A die cut from Border Essential Die is also glued randomly, between the layers. The flowers are cut from Delightful Daisy Die. Once all the elements are ready , assemble the card as shown. Also, fussy cut and tie two tags and hang them using twine on the top fold of the card for an extra interest.


cute christmas card rajni mam
ReplyDeleteI love all the layers and you have paid so much attention to detail!
ReplyDeleteLove the layout ,beautiful xx
ReplyDeleteI love your beautiful card! I was struck by all the detail- you included so many fabulous die! I also really like how you incorporated the sentiment!
ReplyDeleteHugs, Marie