Design candy baskets with your stamps
Posted by Rajni Chawla
Hello lovely ladies...
Hope you all had a lovely start of the year 2014 !!
Most people love and even prefer hand-made over store bought gifts and also prefer to make them more precious by giving them handmade presentations. Gift baskets are as fun to make as they are to receive. The choice of the basket or similar container can also help define the sentiment and theme.
What if I suggest you to design your own gift baskets using stamps...??
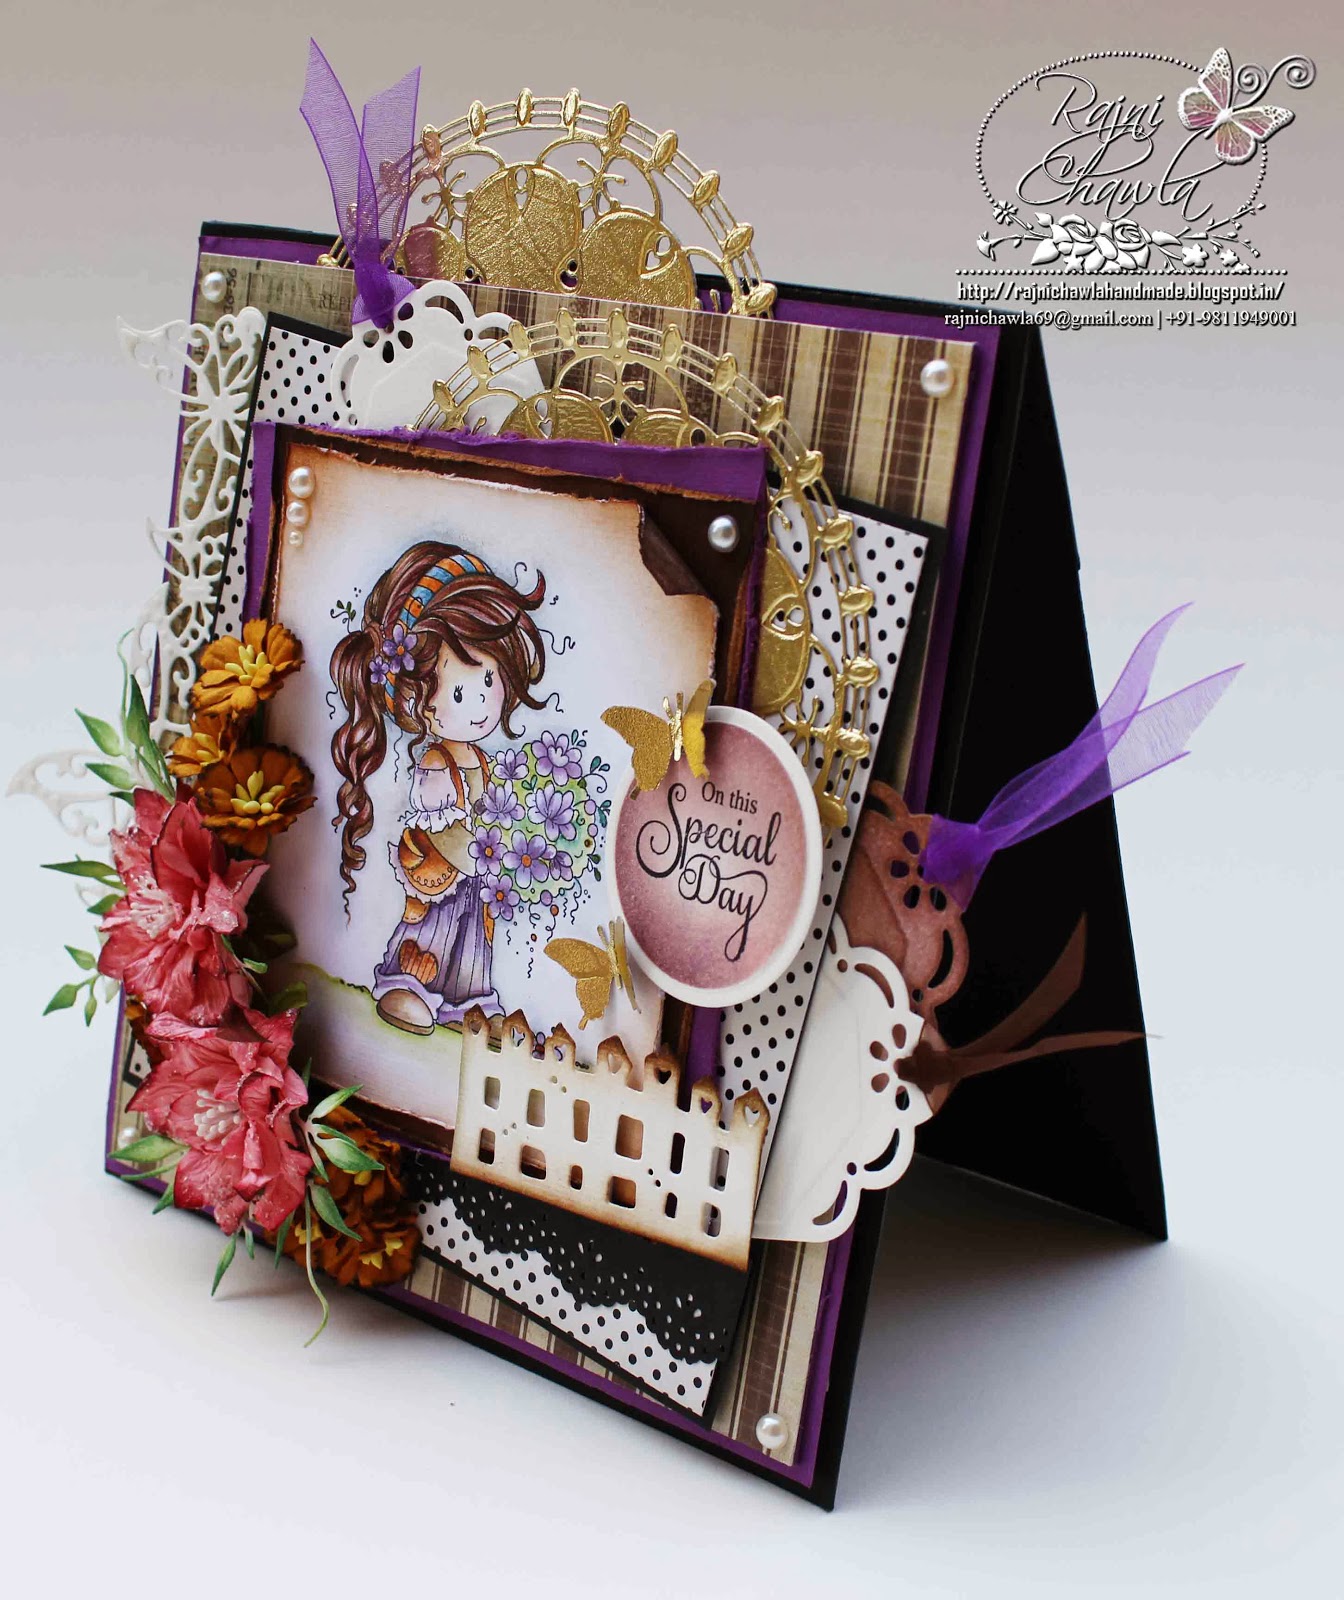
As you all know our current challenge is on making 3 D boxes, bags , baskets or any altered or recycled gifting item. Today I'm here to inspire you with my paper candy basket using Justrite stamps. I myself got inspired to make the same by Marisa Job's candy basket. You can also click to her blog link to see the instructions she used while making this basket. I have used Justrite Clear Stamps - Enjoy The Day and Spellbinders Vintage Labels Four die set to create the four sides of basket .The handle of the basket is made using MS vintage Doily Lace Punch and decorated with black ribbon and pearls.
The flowers are handmade with Joycrafts floral flourish.
Instructions:
Hope you all had a lovely start of the year 2014 !!
Most people love and even prefer hand-made over store bought gifts and also prefer to make them more precious by giving them handmade presentations. Gift baskets are as fun to make as they are to receive. The choice of the basket or similar container can also help define the sentiment and theme.
What if I suggest you to design your own gift baskets using stamps...??
As you all know our current challenge is on making 3 D boxes, bags , baskets or any altered or recycled gifting item. Today I'm here to inspire you with my paper candy basket using Justrite stamps. I myself got inspired to make the same by Marisa Job's candy basket. You can also click to her blog link to see the instructions she used while making this basket. I have used Justrite Clear Stamps - Enjoy The Day and Spellbinders Vintage Labels Four die set to create the four sides of basket .The handle of the basket is made using MS vintage Doily Lace Punch and decorated with black ribbon and pearls.
The flowers are handmade with Joycrafts floral flourish.
Instructions:
1. Cut a black card stock measuring 4 3/4" by 4 3/4 '' and score all sides at 1/2 an inch.
Cut extra corner.

2. Again take 1/4" on all the four sides and make a slit. Cut it diagonally. This will make the base of the basket.


3. Stamp four images with justrite - Enjoy the day stamp with deep maroon (currant) Adirondack ink and fussy cut the edges. I have cut the base of the image to give a flat look to the basket.
4. Cut four pieces using black card stock with Spellbinder's Vintage Label Four and cut the base.


5. Color all the stamped images with distress markers/inks /copics.
6. Construct the four sides of the basket by sandwiching one stamped image and one vintage label die-cut to the base of the basket using red tacky tape or with any strong glue.


7. Lift all the sides and tie them with a ribbon bow and decorate the basket as per your choice.Here is the complete look....of both


And this one without handle...

A little close-ups of both...


Aren't these pretty??Show your friends and family your love with beautiful handmade baskets made
from your very own heart and hands!
So...what are you waiting for??
Just give yourself a little try on handmade presentations for your gifts for your loved ones.
Also don't forget to participate in our current challenge,boxes/bags /baskets,hosted by my co Dt Tanvi
All the supplies used are available at The Craft Store or you can even customize your orders with Priya Sivaraj.


12 comments:
Dear Reader,
Thank you for your precious comments. They are extremely valuable and a source of continuous motivation for me. I really appreciate the effort.
Love,
Rajni