Showing posts with label fussy cutting. Show all posts

Tuesday, May 03, 2016

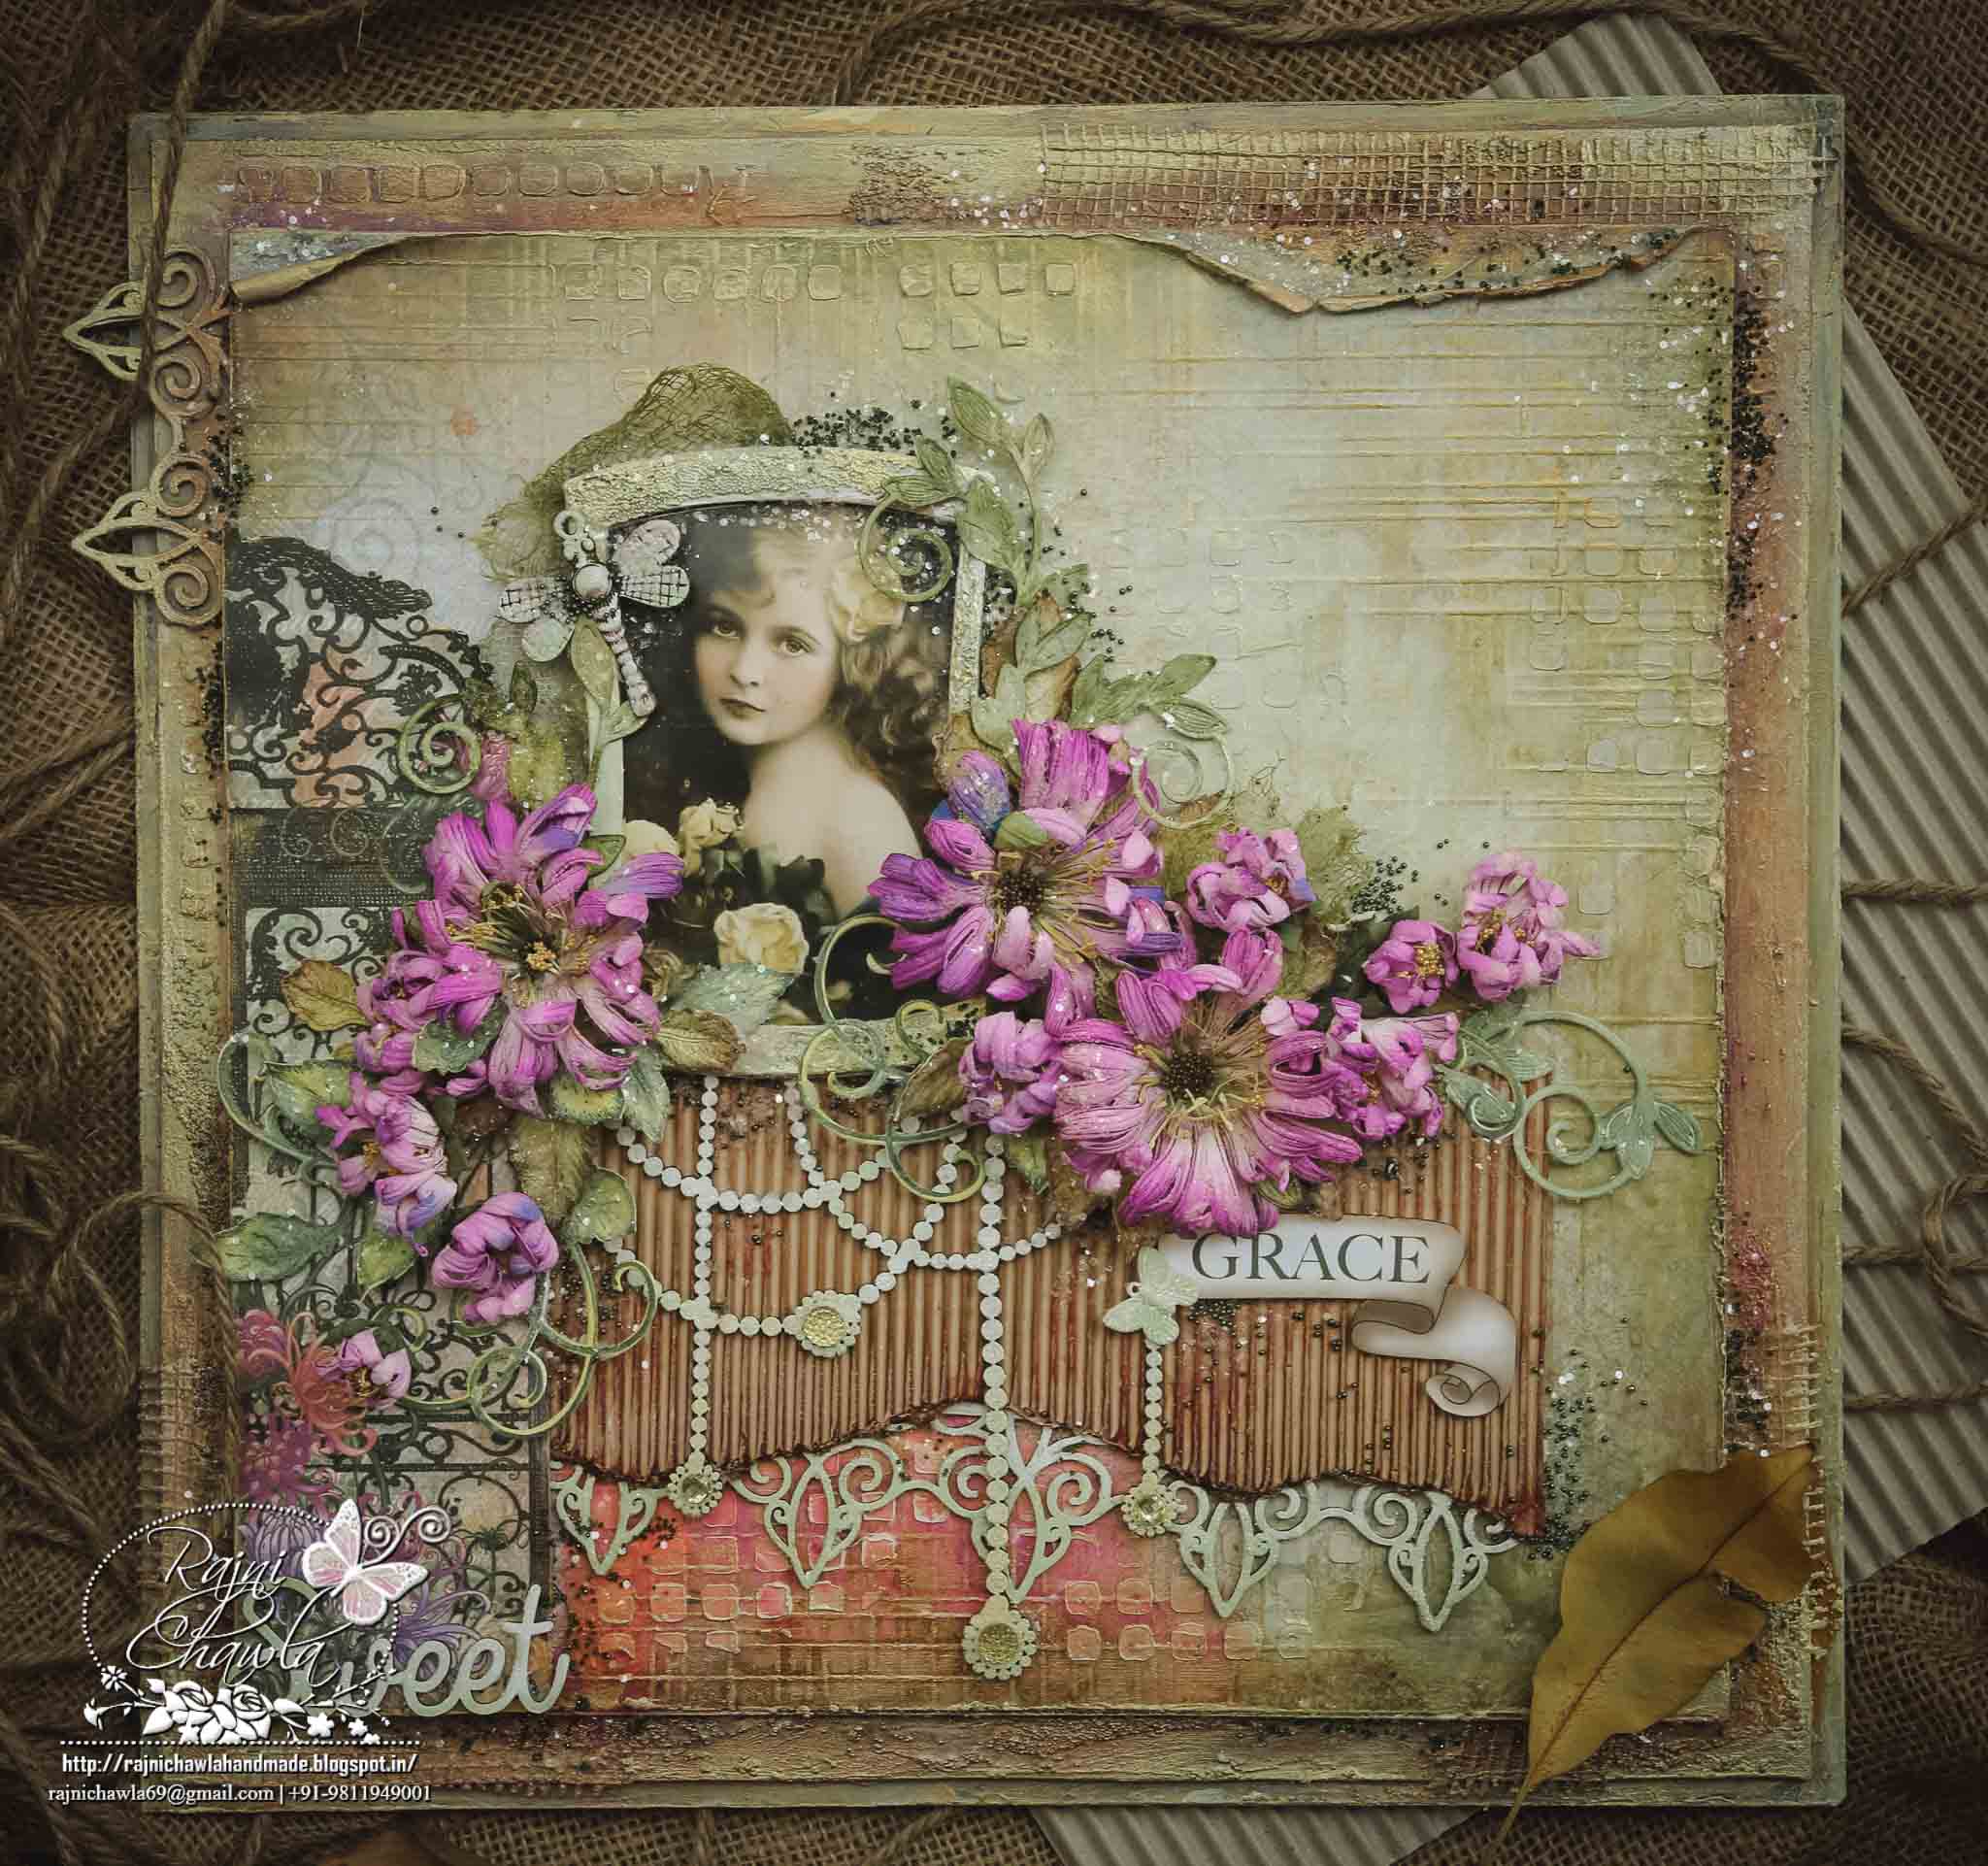
Grace: Layout using HC Enchanting Mum Collection

Posted by Rajni Chawla

Good morning friends!!

I am so thrilled and excited to see myself on Heartfelt Creation's board. It's a dream team. God has given me a wonderful opportunity to enjoy this beautiful world of crafting and to meet few more talented crafters across the globe. I know it's going to be a fun learning time with HC family. Today, I am on board with my very first project as a Heartfelt Creations Design Team!
Though I was bit nervous while creating this project as I entered my craft room after many days due to my ill health, but I have surely tried my level best to inspire you.

Full View of the layout: 

HFC 30th April-14


HFC 30th April-13

Heartfelt Creation Products Used: 


Other products:

Archival inks Library Green, Clear Rock Candy Glitters, Stickles, Heavy Gesso, Silk Glaze, Micro beads, Dusty Attic Chipboards, Texture Paste, Prima Stencils, Heavy Chipboard, Dry Mech, Spellbinder’s Wonky Rectangles, mists /sprays and Acrylic paints, fussy cutting scissors.

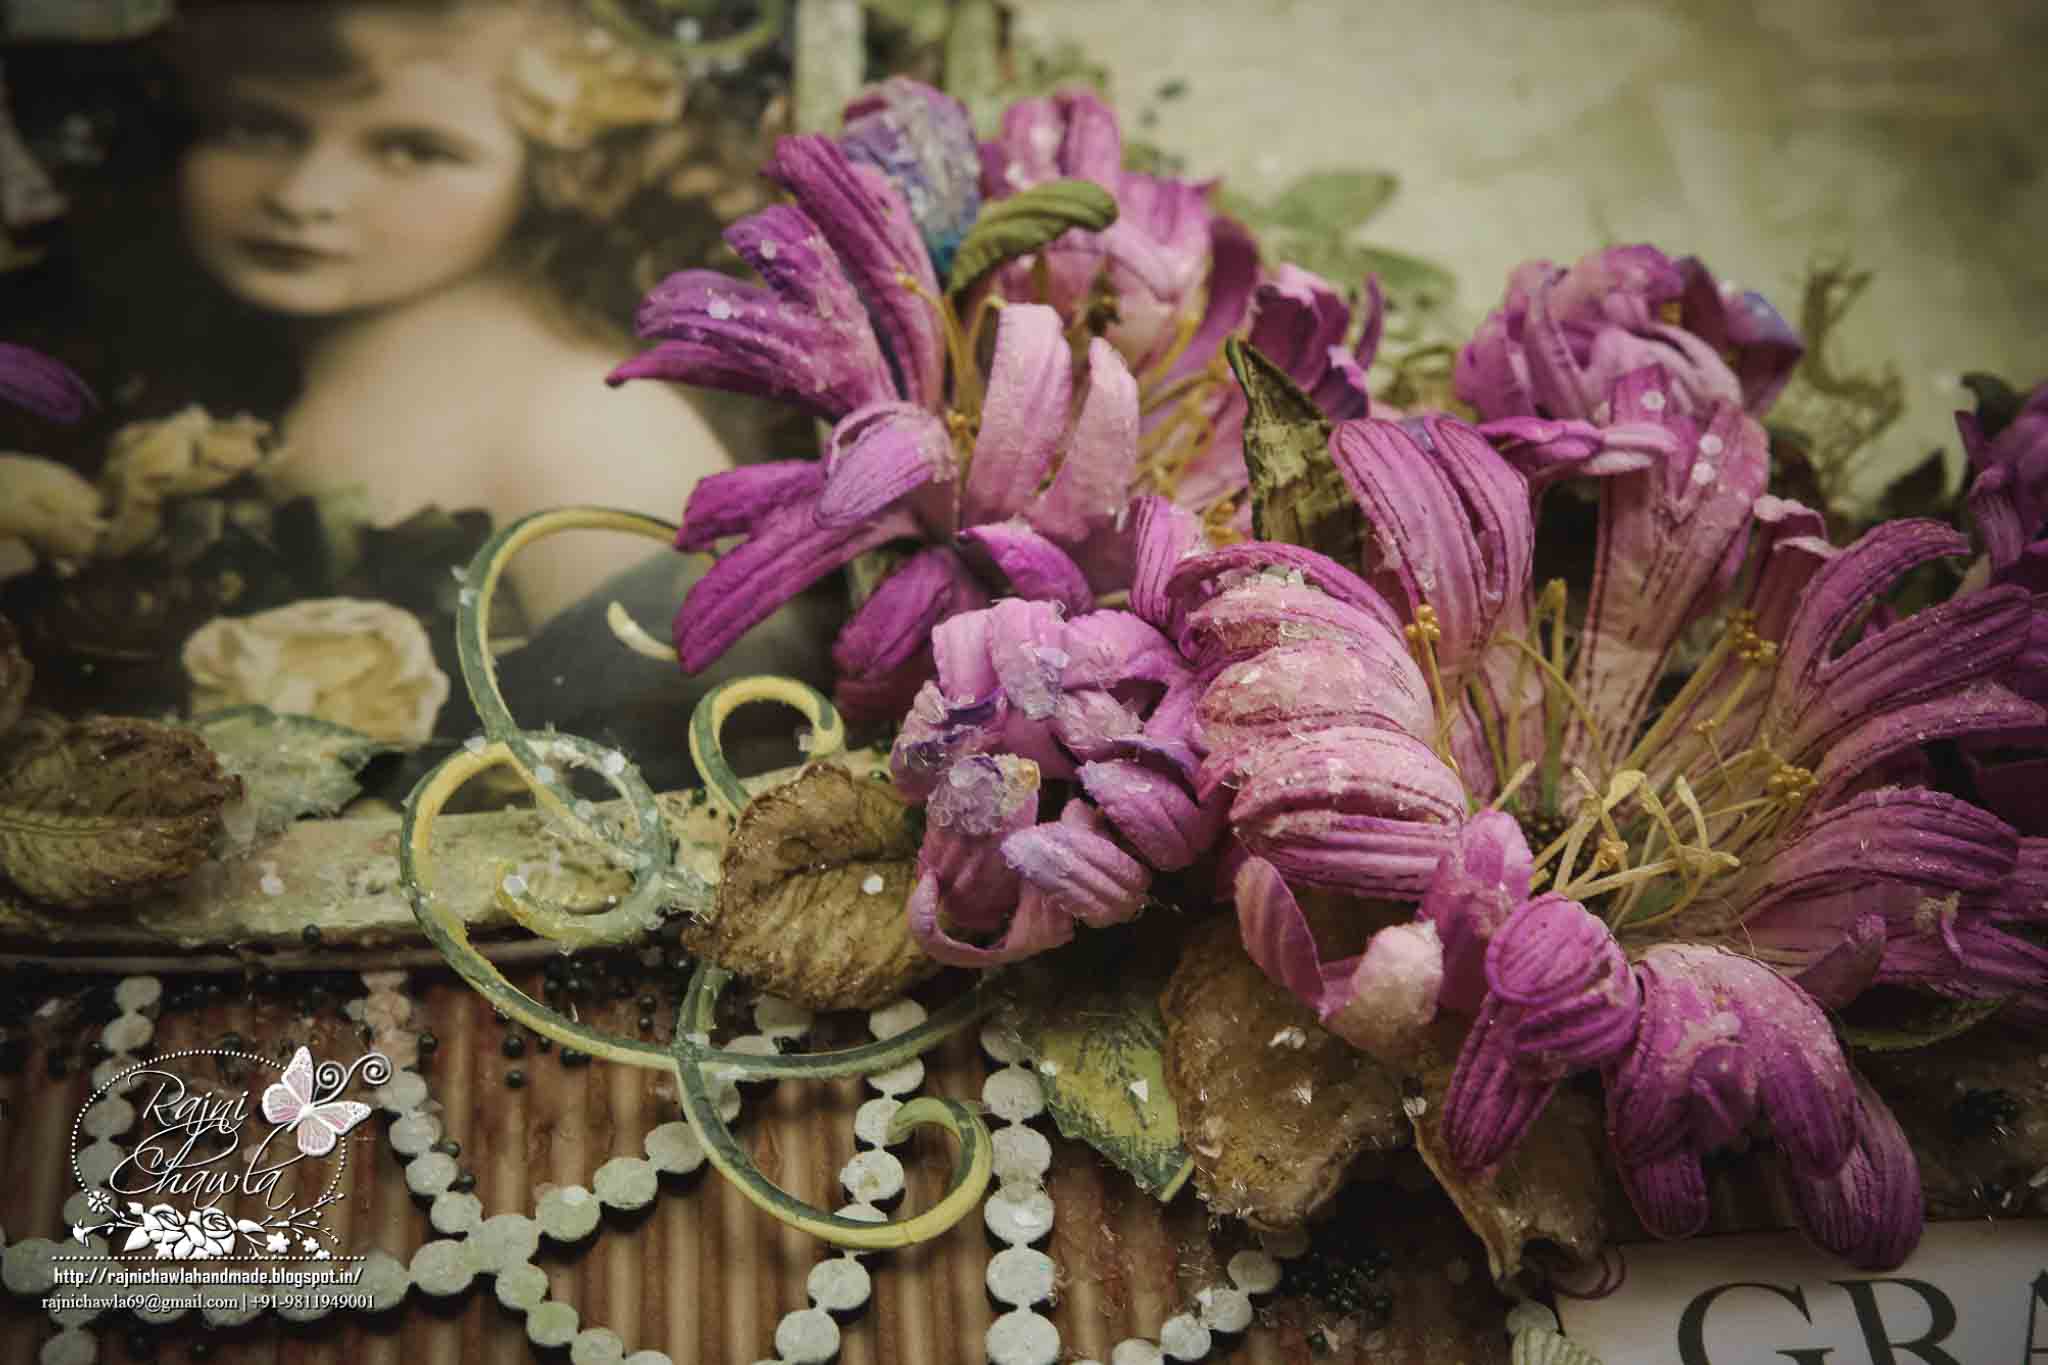
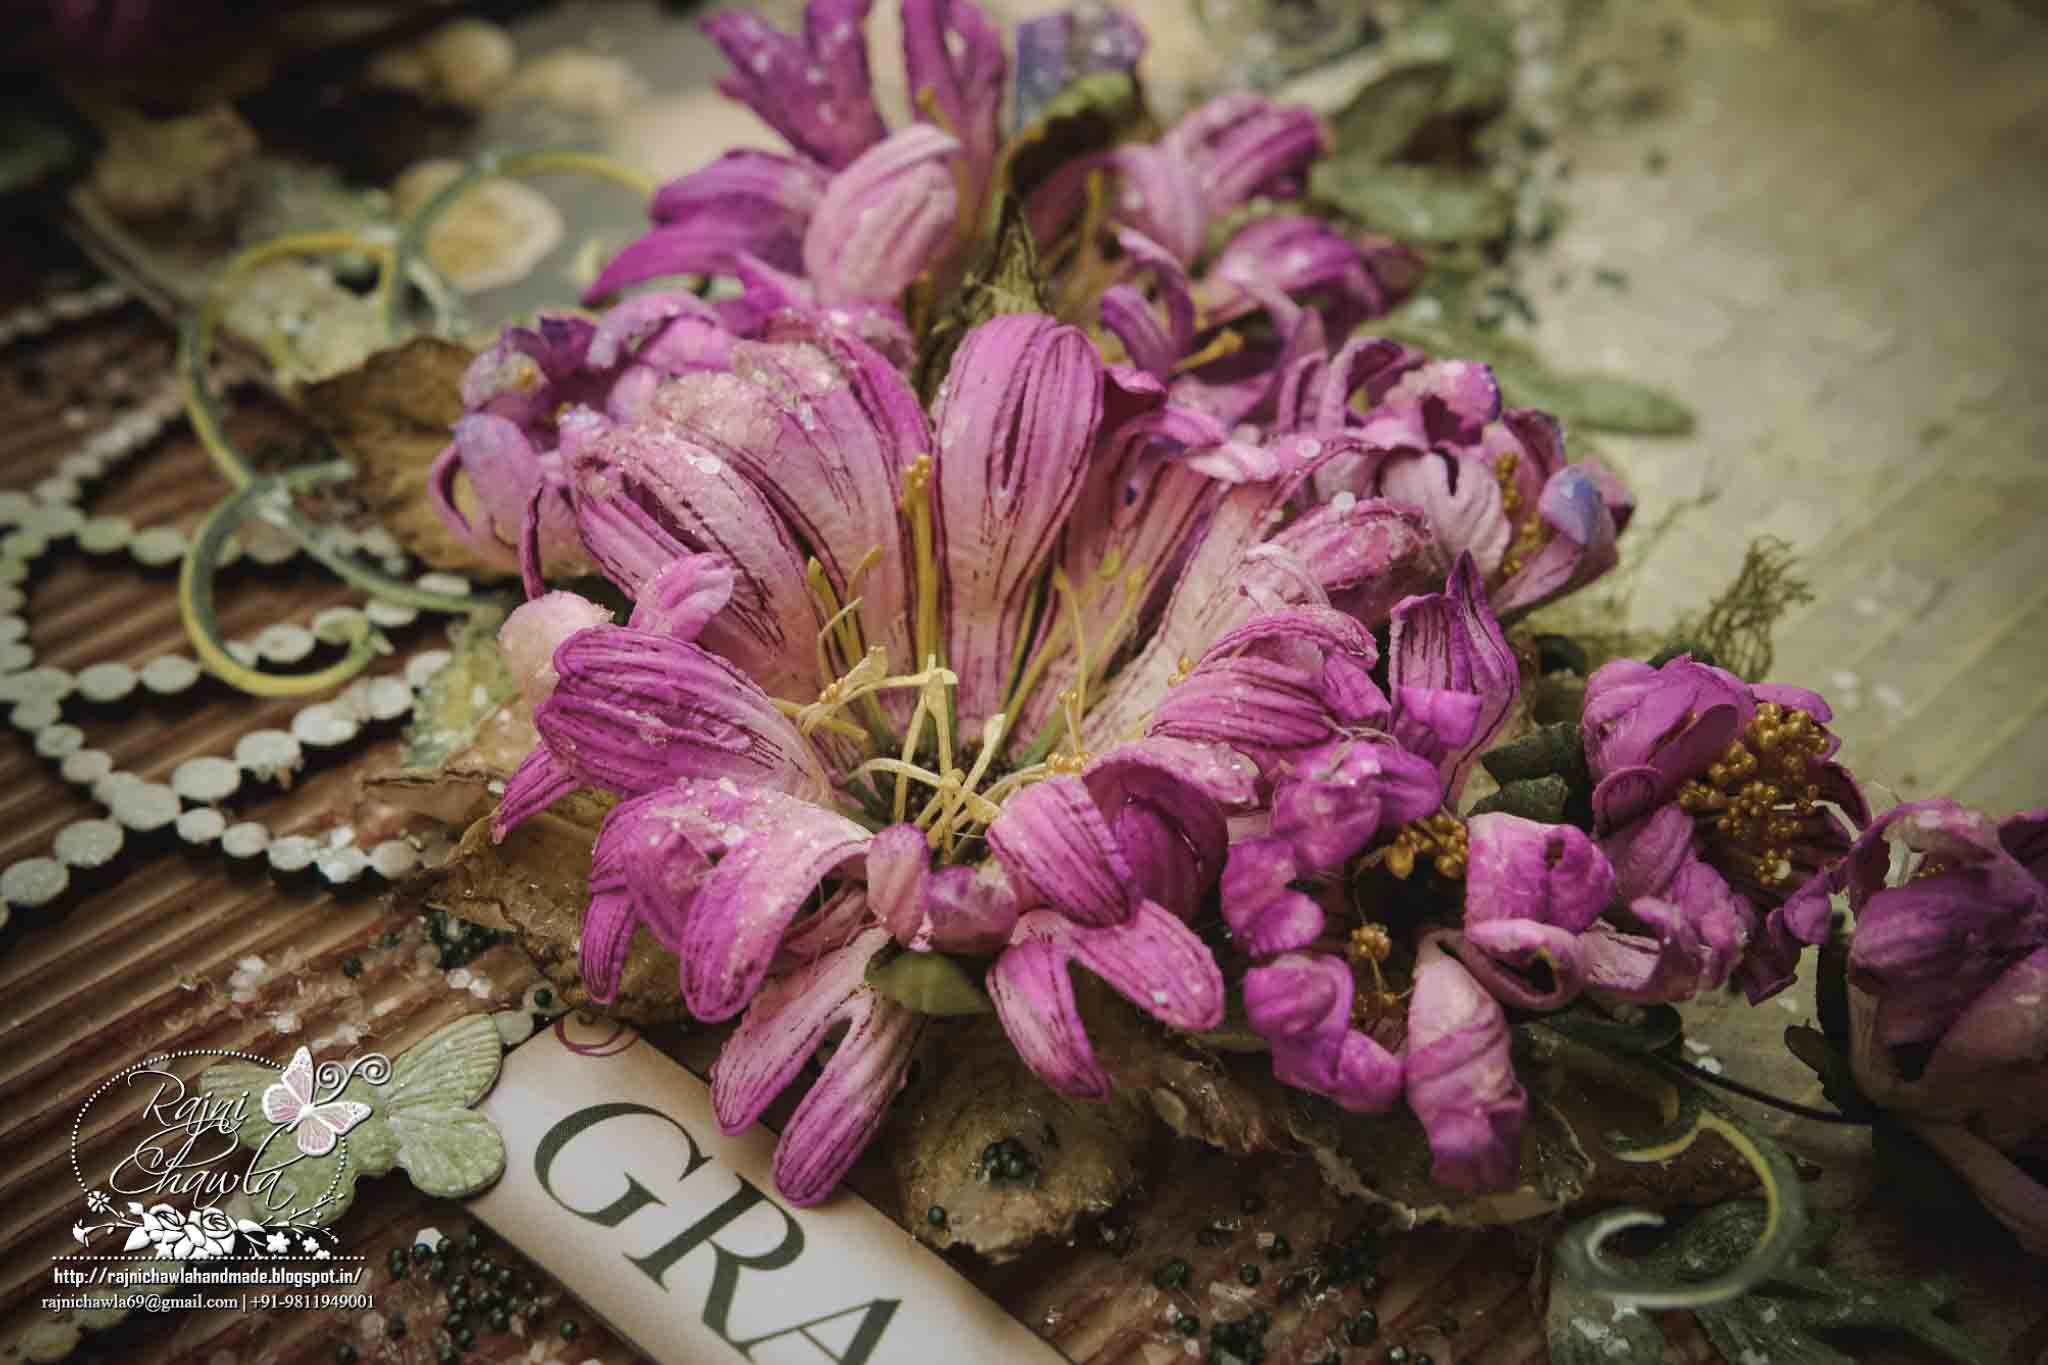
Instructions for Flowers and leaves:
 Follow Emma Lou’s video below for shaping Enchanting Mum Flowers.


The flower centres are made using stamens of Sunrise Lily die. Paint the stamens with ColorBox Fluid Chalk Ink Pad – Harvest and Lime Pastel and split them in half. Add Prills using - Art Institute Glue that Dries Clear. Leaves are all stamped with Library Green Archival Ink and painted with ColorBox Fluid Chalk Ink Pad - Lime Pastel. Leaves and flowers are shaped using Deluxe Flower Shaping Kit.

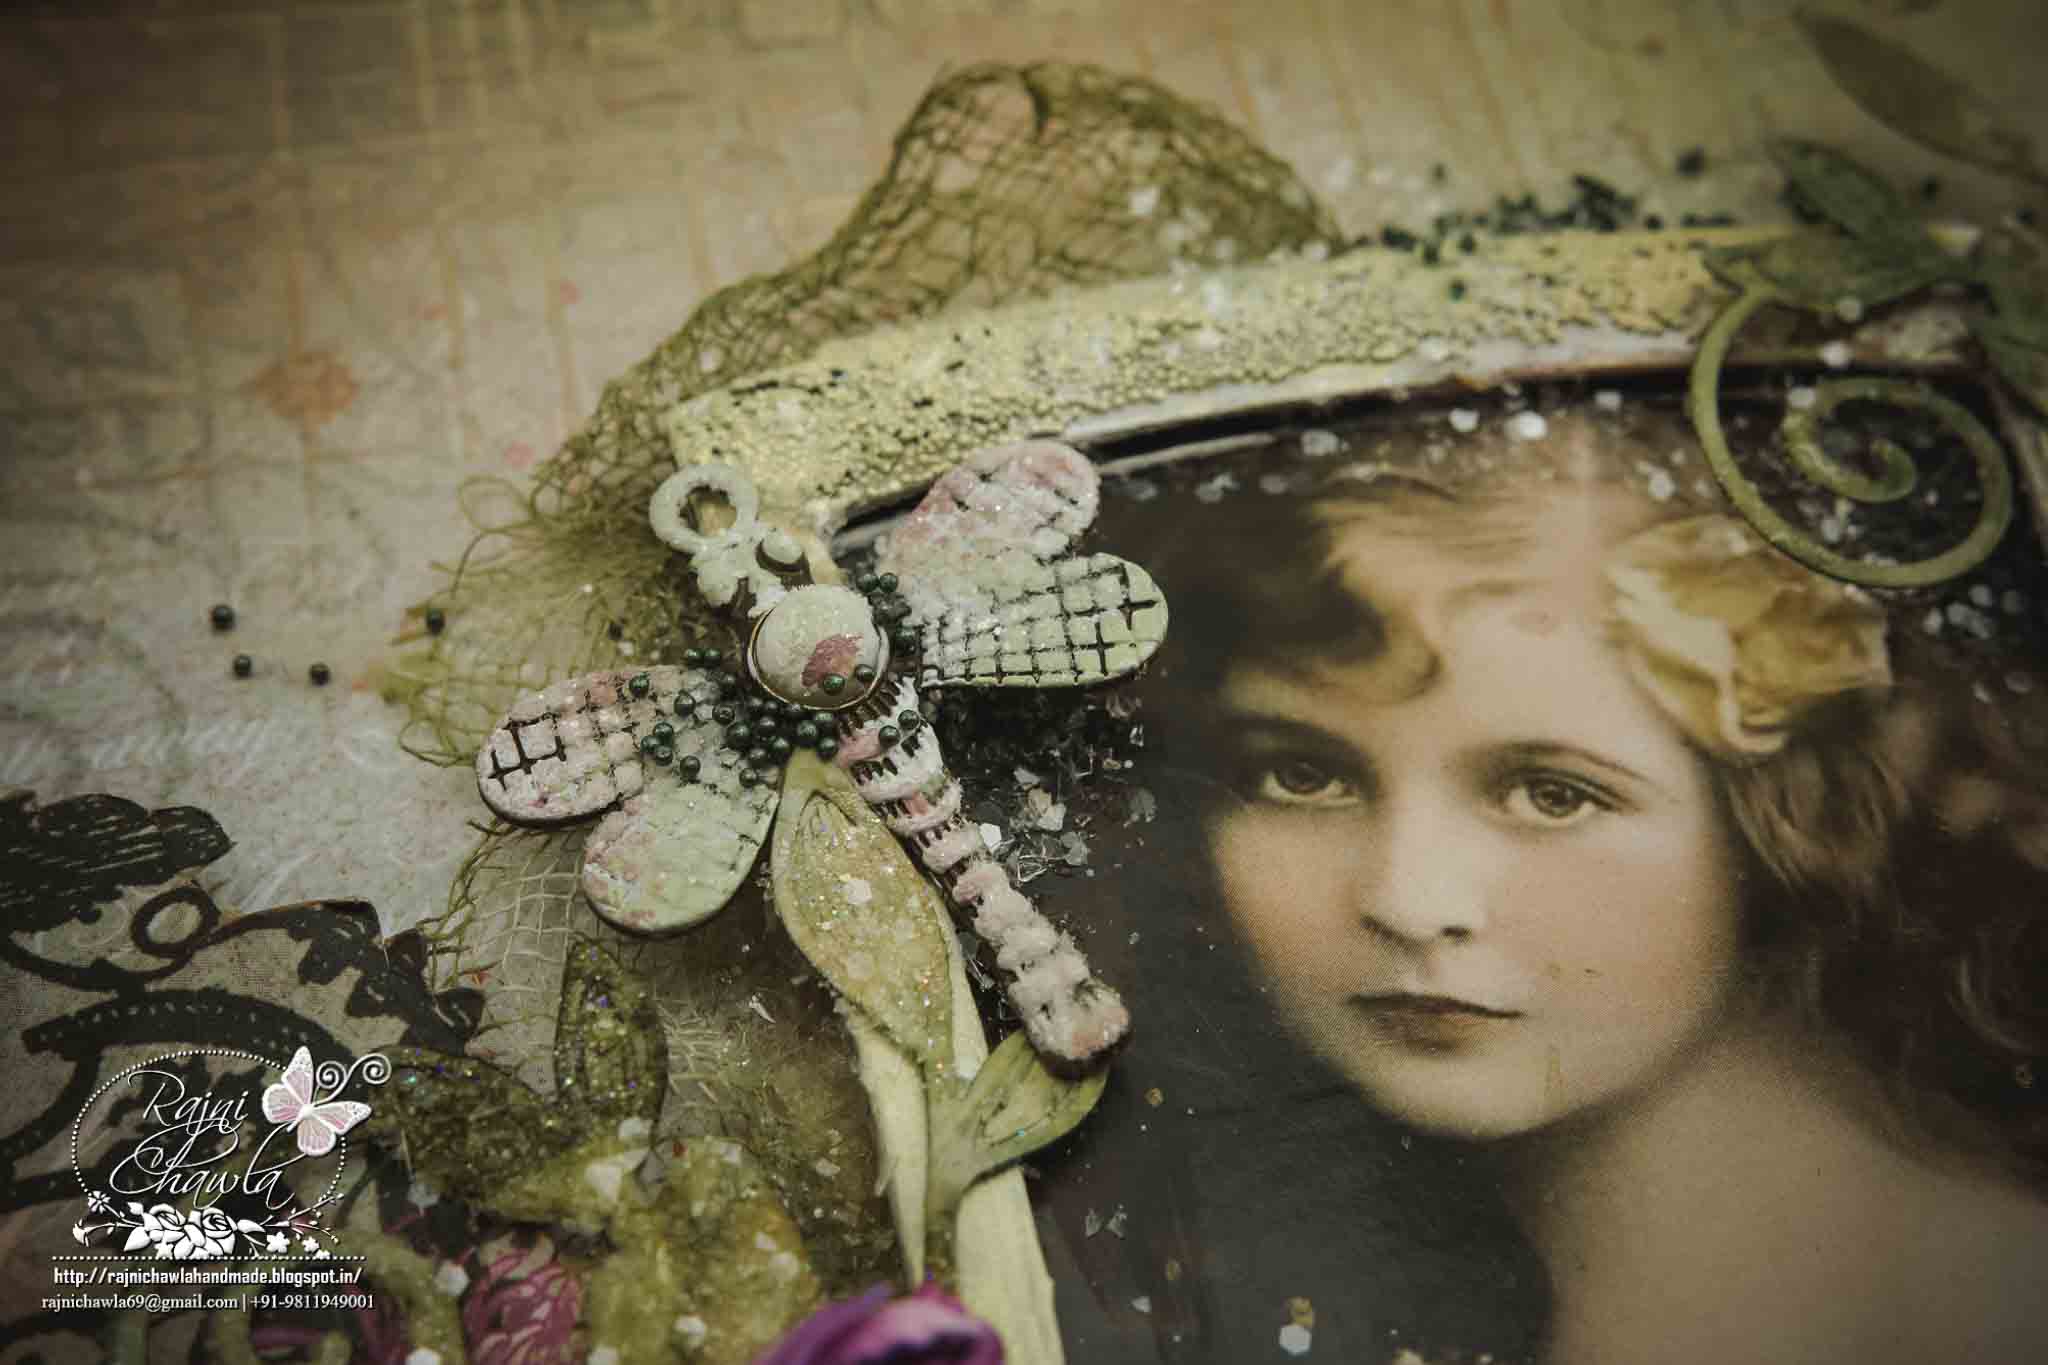
Instructions for Vintage Girl Frame:
 The vintage girl image is downloaded from Pinterest. Nest outer two dies of Spellbinder’s Wonky Rectangles with heavy cardstock and make a frame for the vintage girl image. Give a light coating of texture paste on the frame and sprinkle micro beads and leave it for drying. Once dried apply matching shades of acrylic paint and paint the frame.

Instructions for Layout:
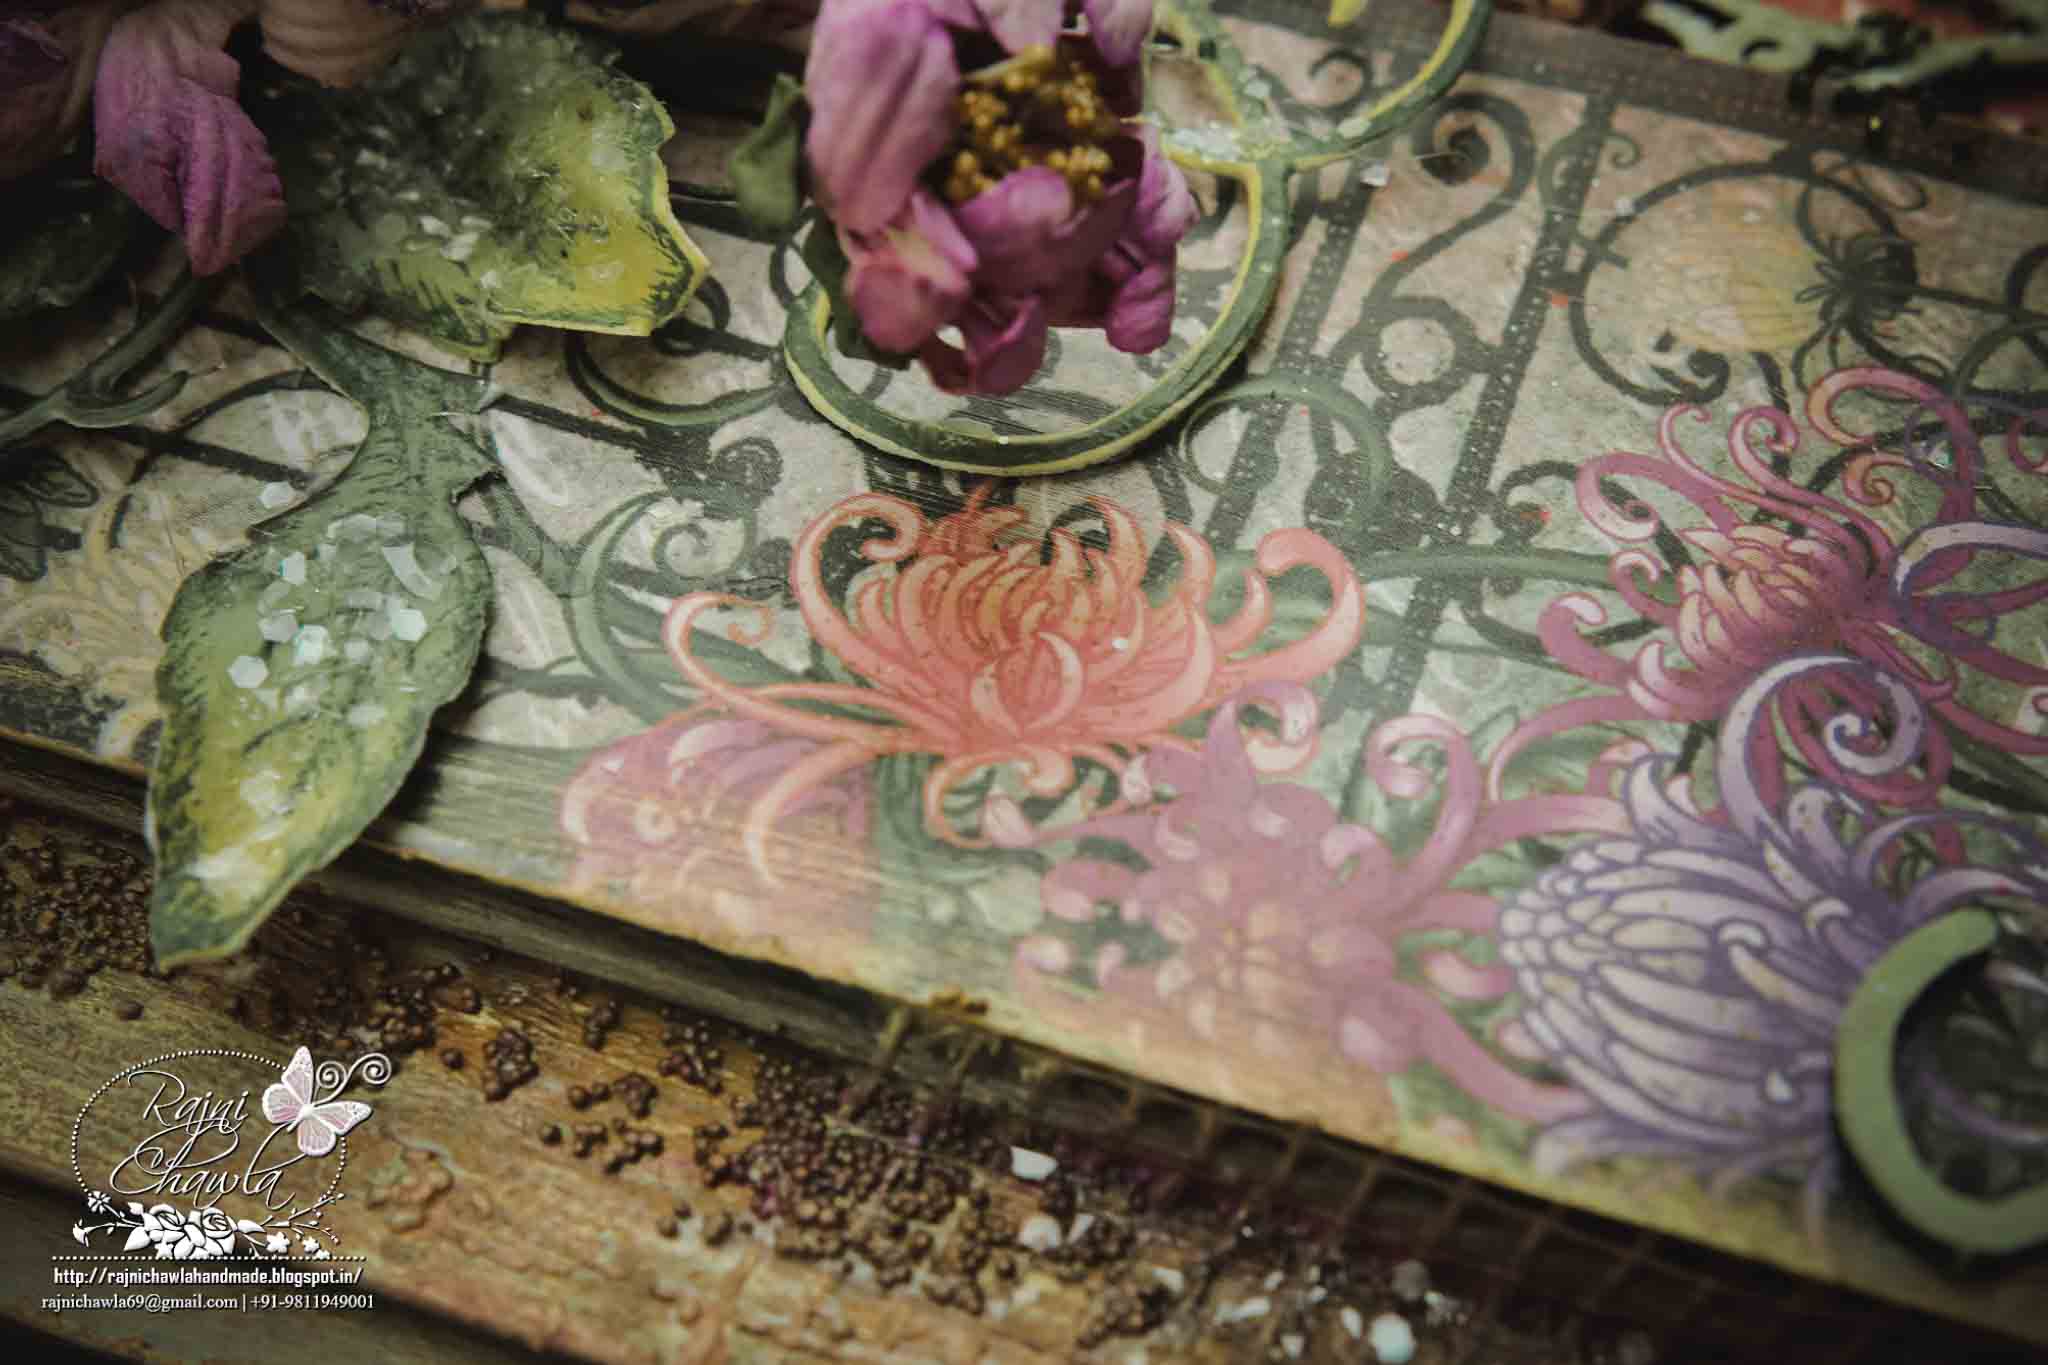
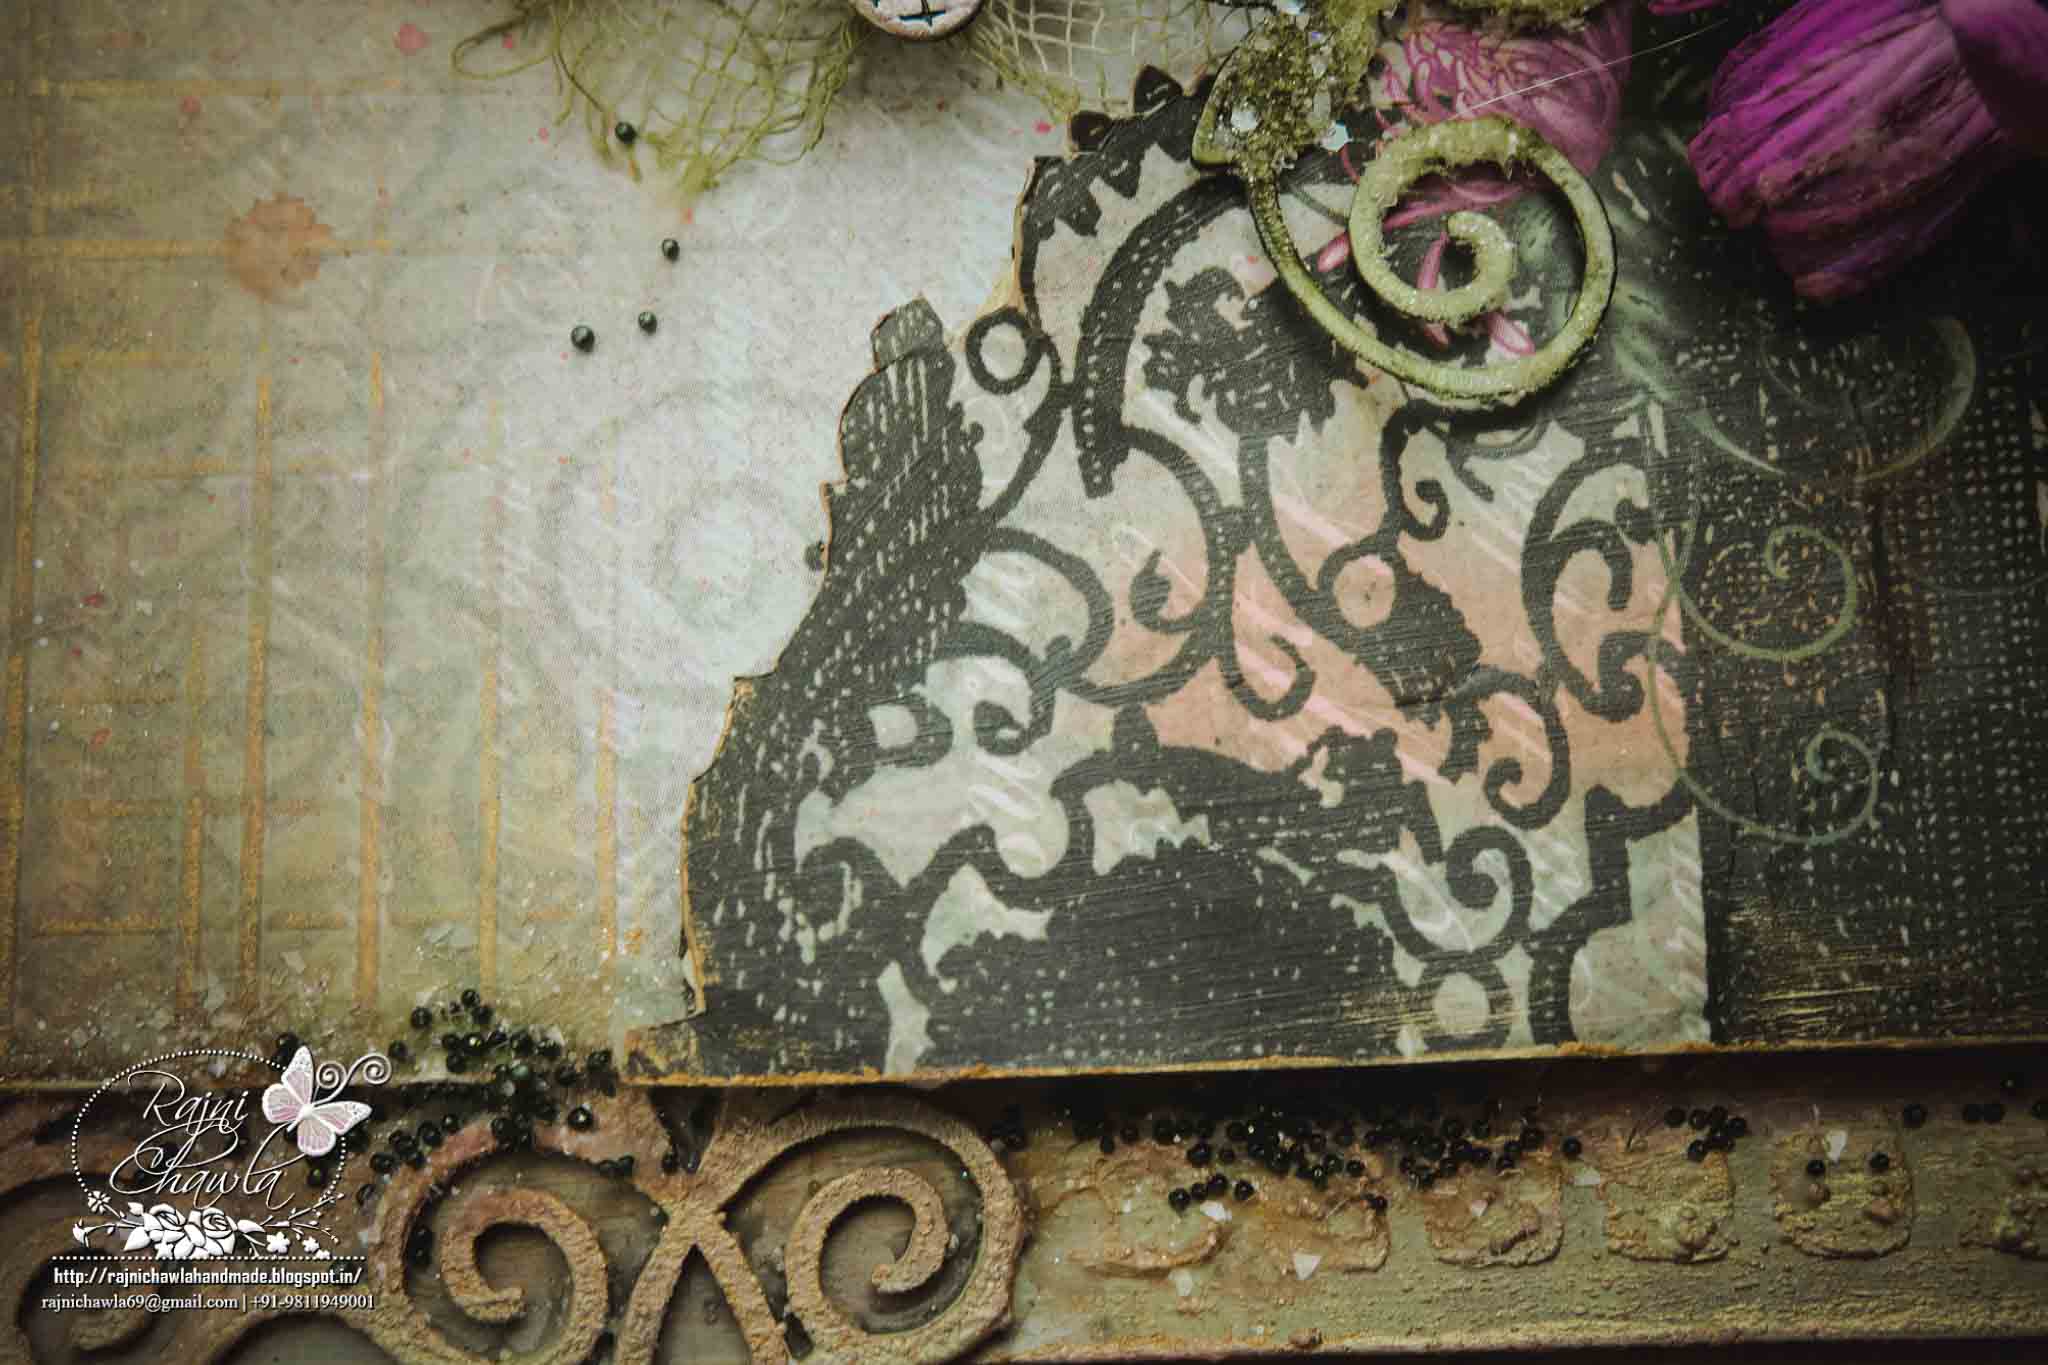
Fussy cut the floral gate using fussy cutting scissors. Score rest of the designer paper using score pal randomly and apply a coat of diluted White Gesso. Stick the designer paper to heavy chipboard and also, layer the fussy cut floral gate.  Apply texture paste randomly using stencils and leave it to dry. To speed up the process you can use the heat gun. Once dry spray with shades of pinks and greens. Build few layers of colors drying in-between the layers. Once satisfied with the background highlight all the details with silk glaze.  Dusty Attic chipboards are all painted with dusty in colors acrylic paints and dusted with clear rock candy glitter using Art Institute Glue. Assemble the layout by creating different layers with chipboards, corrugated sheet and cheese cloth and also add dimensions using glue dots.

Here are the detailed pictures...

Beautiful Mums flowers!!

HFC 30th April-1


HFC 30th April-9


Gorgeous designer paper from Enchanting Mums Collection...

HFC 30th April-12


HFC 30th April-11


HFC 30th April-10


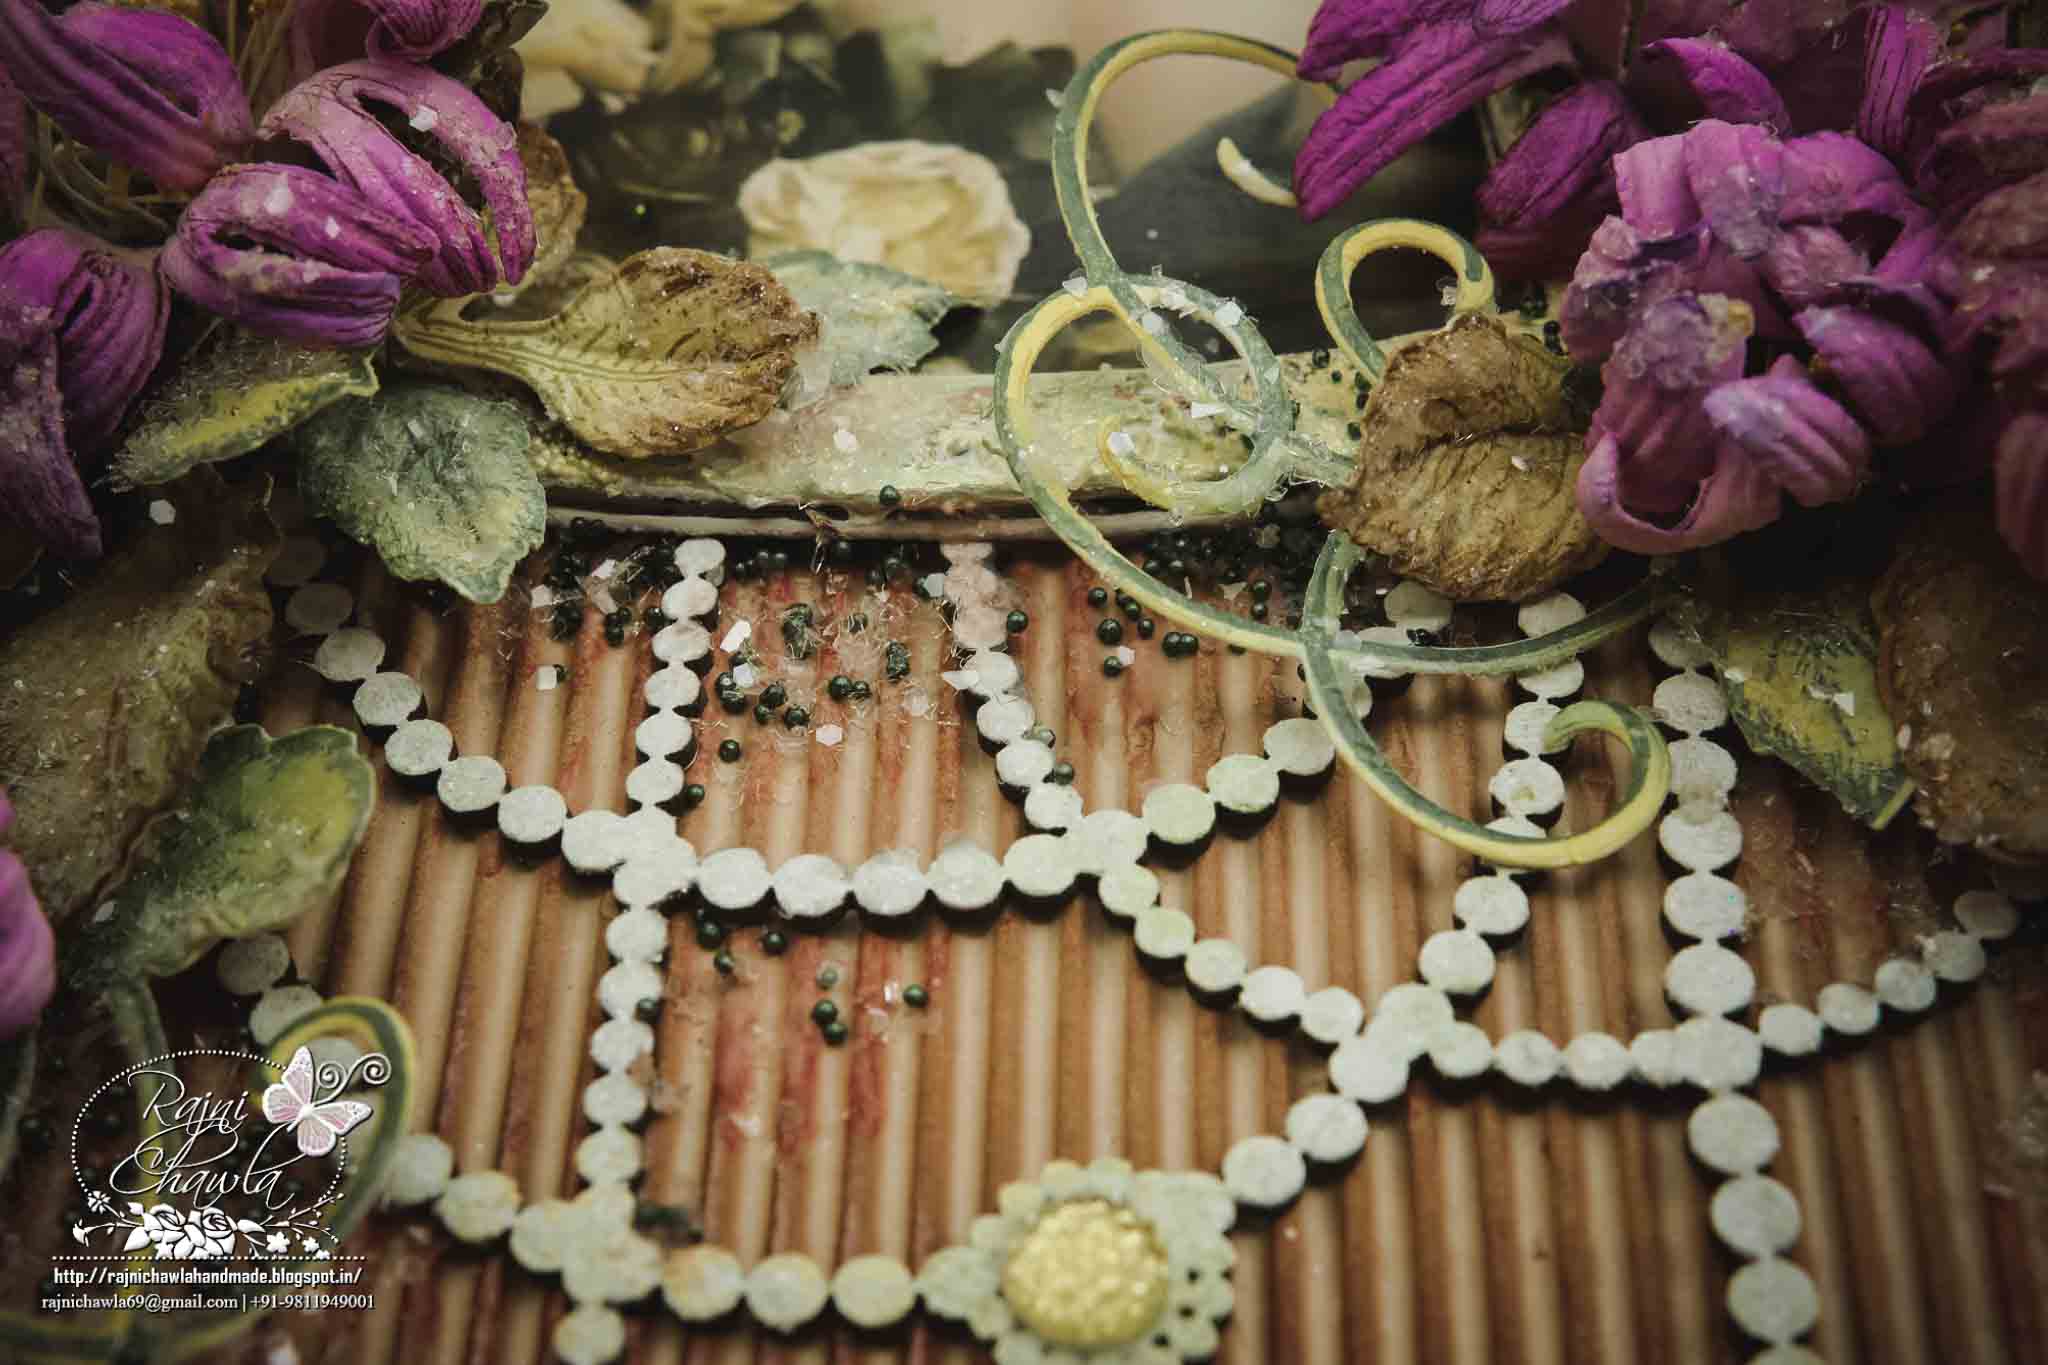
Dusty Attic chipboards...

HFC 30th April-5


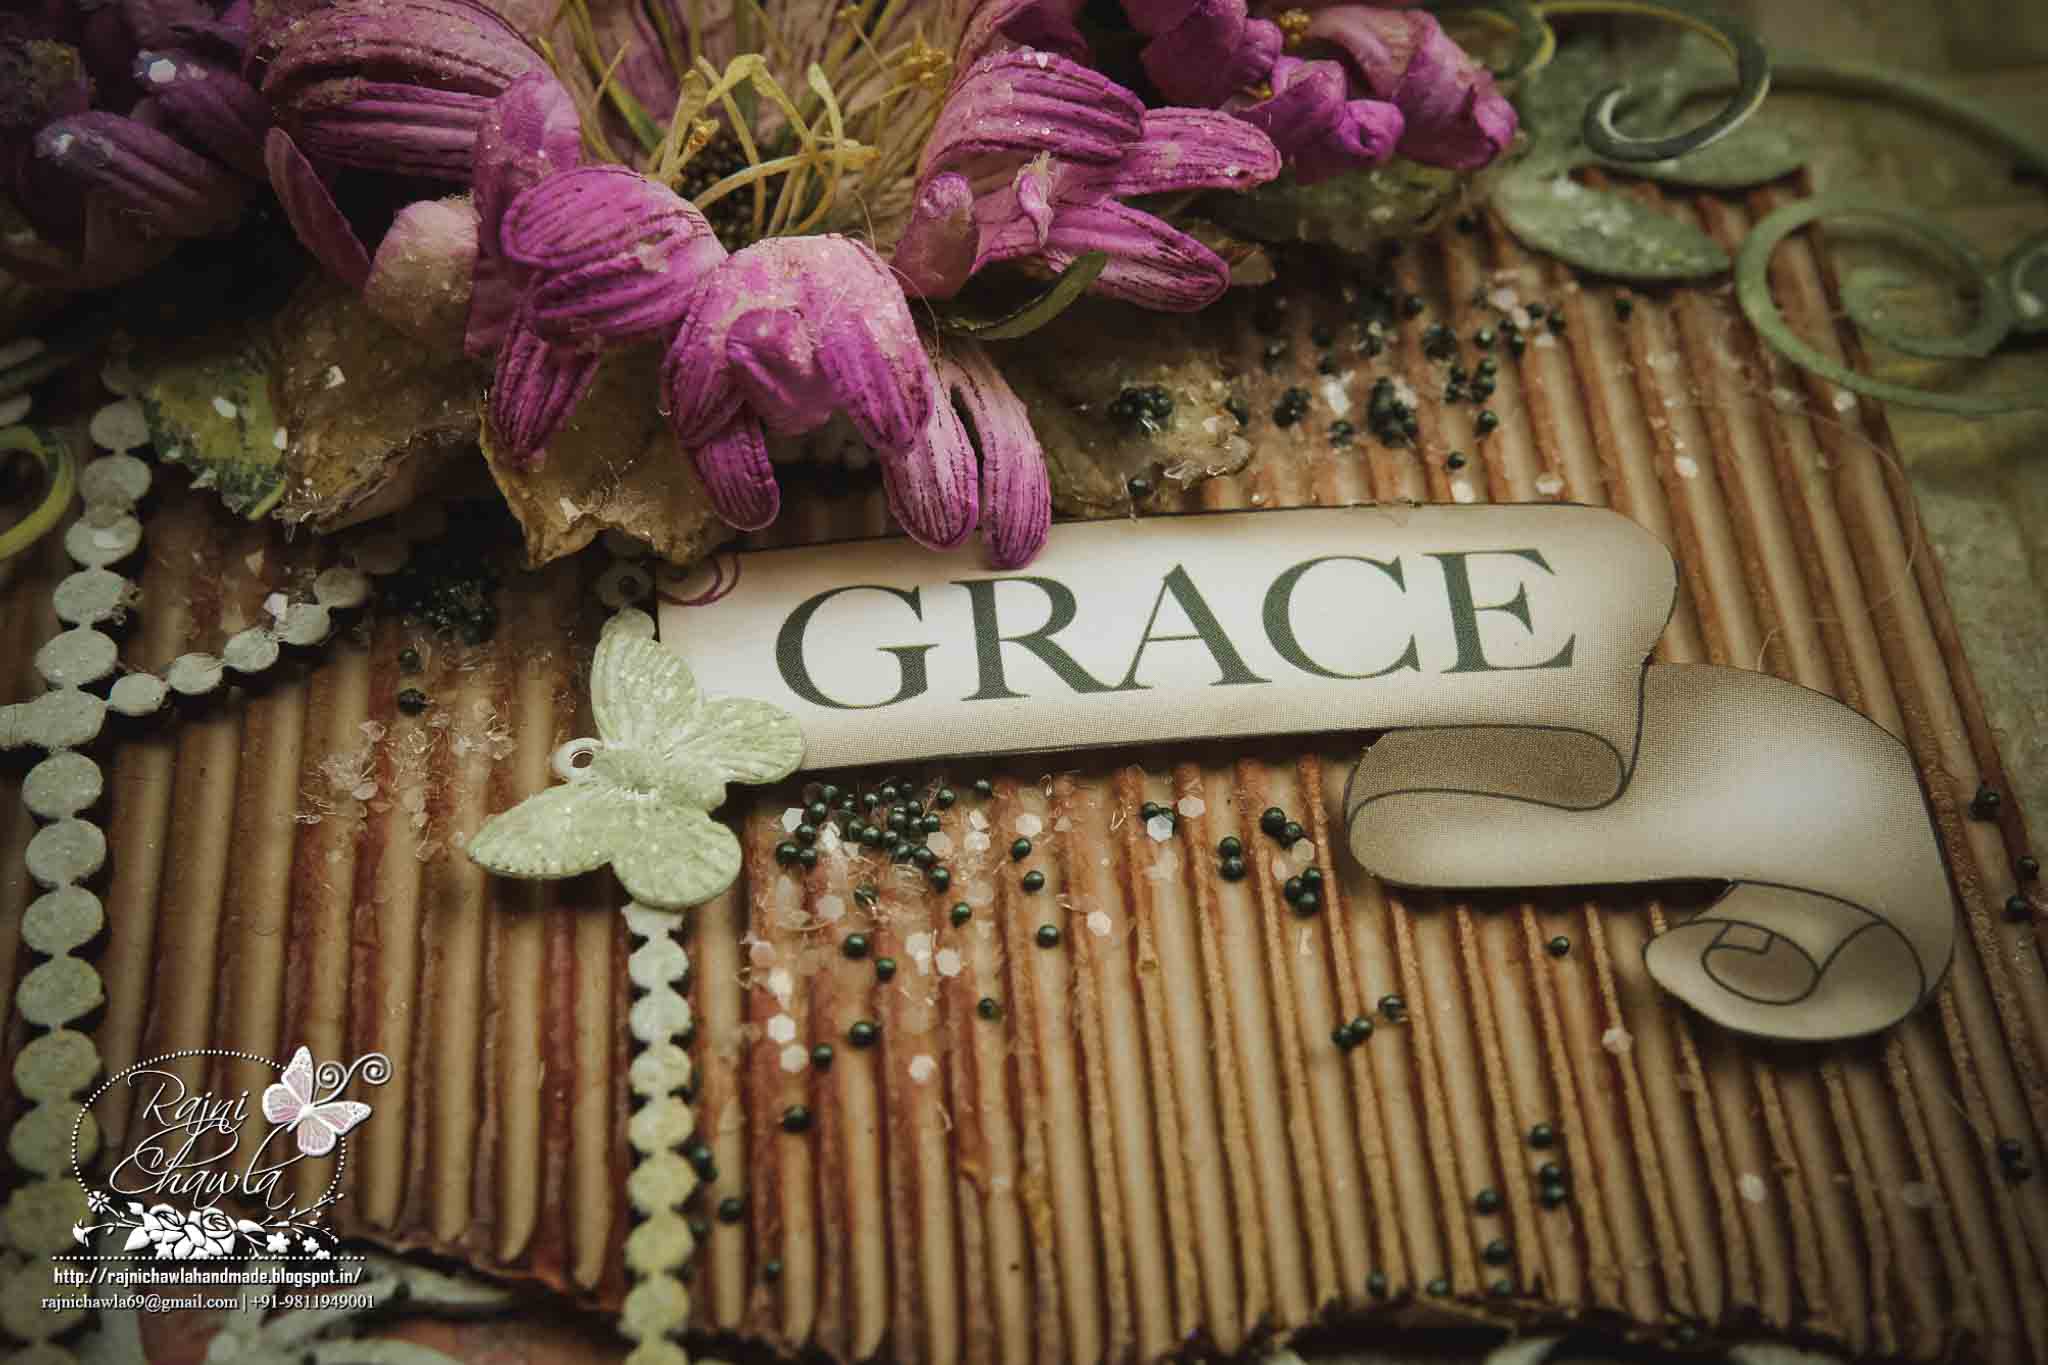
Banner fussy-cut from designer paper itself.

HFC 30th April-6


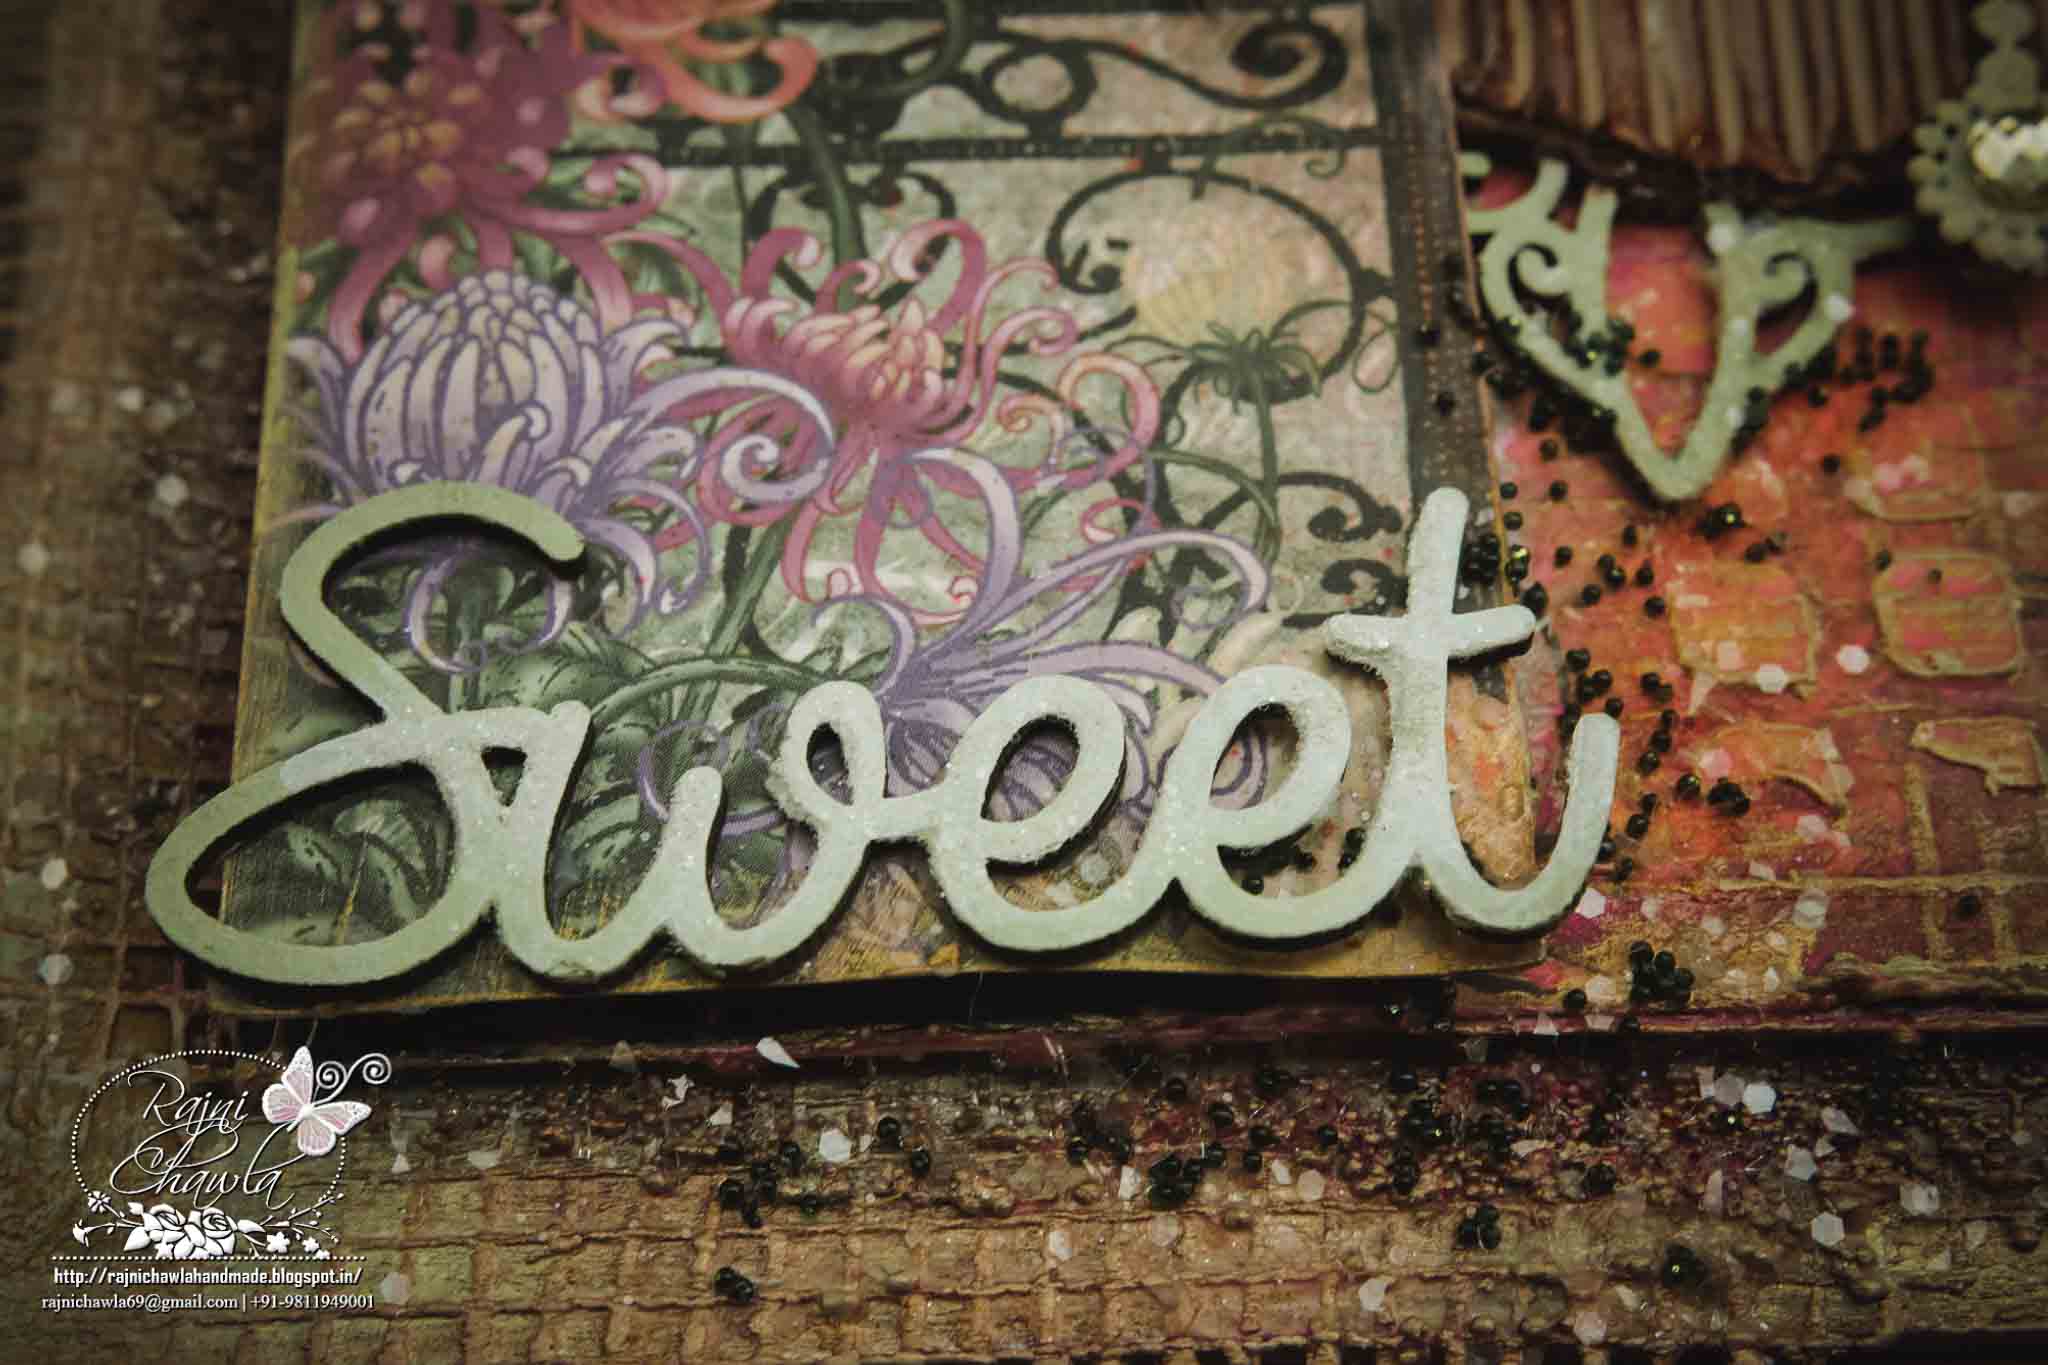
Sweet....another chipboard from Dusty Attic!!

HFC 30th April-4


Chipboards beautifully layered between corrugated sheet. 

HFC 30th April-8


Frame created with Spellbinder's Wonky Rectangles textured with mix media texture paste.

HFC 30th April-3

Hope I was able to do justice with this collection and I was able to inspire you with this creation of mine.
If you are an Indian crafter and looking for craft supplies at best prices contact Meetu Aggarwal (www.krafterscart.in) or Priya Sivaraj ( www.thecraftshop.in).

  Thanks for stopping by!!


Happy crafting!!

Monday, March 14, 2016

Heat Embossed Card with Heartfelt Creation's Birds and Bloom Collection

Posted by Rajni Chawla

Hello all...!! 

Hope you all had a great weekend and a great start of new week. Today I am here with quite a neat and simple card that I created when I was not well. Sitting on the bed and not allowed to enter the craft room for nearly 10 days ...nothing worst than that could be for any crafter. Still I managed to paint few images. Since I was not allowed to do fussy cutting those days, this was done by my daughter Srishti. Though I have not taught her anything but she is master in many. She can cut much much better than what I do. My bad luck...she crafts only if I m not there in craft room and prefers to do only for her friends. 

For this card I chose two of the stamps from Heartfelt Creation's Birds And Blooms Collection. The one is the background stamp (Birds and Blooms Collage Cling Stamp ) and other has beautiful birdies and flowers ( Fluffy Birdies Cling Stamp ) 

Here is the final result. 


The background is simply heat embossed using Versamark ink and white heat embossing powder on vellum sheet. And the stamped image is painted using peeled paint, barn door, vintage photo and brushed corduroy distress inks. Few images on the vellum background were also painted with same shades of distress inks. 


After painting the image it is fussy cut using Xacto knife. Many of you liked my fussy cutting and asked me what scissors or cutters I use for fussy cutting. I work with simple Xacto knife and Parchment scissors. I have tried many cutters but found these best till date. Plastic body cutters don't work  for me as I often use 220 gsm card stock for painting. Its difficult to put more pressure on plastic body cutters as they break very easily. Yes...for thinner papers of-course they work very well as it needs less pressure. 


Here is the more closer look of the image. I have used Glamour dust dry glitter using art glitter adhesive glue which dries clear.  The heat embossed vellum is layered on pattern paper from Birds and Blooms Collection itself. The white ring is cut out by nesting 2 circle dies together on white card stock. 


Though I hardly make clean and simple cards but I really loved making this one. Birds and flowers have always been my weakness. Hope you too liked this card. 


If you are new and hunting for various craft supplies at best prices in India,you can contact Meetu Aggarwal  or check her website Here  and Priya Sivaraj or check her website Here 

Hope I m able to inspire you with my creations. If you like my work and want me to see reach my goals as a Dt with Heartfelt Creations, do leave some love n vote for me. Each single vote is precious for me. You can check all my three creations that I submitted for semifinals in the photograph below.


For more detailed pictures of Desk Calendar cum Mini Album....Click HERE
For more detailed pictures of Flip Fold photo Booklet .....Click HERE
For more detailed pictures of card Let Love Blooms.....Click HERE

And, to vote click HERE 


Thanks for dropping by. 
Happy Crafting !!

Wednesday, March 09, 2016

Celebrate...Blazing Poppy Collection

Posted by Rajni Chawla

Good morning all 

A warm welcome to my blog again. I am back again with another inspiration with Heartfelt Creations for you all. This time I have created a card with their Blazing Poppy Collection. Oh... I love the gorgeous brilliant red poppies... a bright and happy flower it is!!

I don't know how they do it, but Heartfelt Creations every month brings out a new collection and each is more gorgeous than the other! Although Blazing Poppies is an old collection of theirs but it's one of my favorites. 

Just when I was eagerly waiting to get my hands on the complete Sunrise Lily Collection, guess what... they have gone ahead and released another spectacular range: the new Winking Frog Collection. Each of their new releases just keeps tempting me. Gorgeous pattern papers, mind blowing subjects and unique-designs, every month tease me and make me want to spend more... but mind it worth each penny!!

Let me open my heart a little today. I so love their collections that I want to have my hands on them first. I just don't want to wait for days to get them in my hands. And this... is one of the biggest reason why I want to join their Design Team :-) I just want to see myself moving and growing along with their design team. I am crazily in love with their each collection. 

On to the card now...


For the focal image I have mixed and matched both the images from Blazing Poppy Stem Cling Stamp Set. The image is first stamped with black Archival, painted with Steadtler water color pencils and them fussy-cut. The main flower is stamped, painted and layered with an extra layer and adhered with glue dots. 


For the background I have used two shades of greens from my Shimmerz spray collection. Sprayed quite a few times and kept building layers by drying it in between the layers. Then applied a texture paste through the stencil and sprinkled clear glitter when wet. I preferred it to dry naturally as texture paste bubbles and creates extra textures on heating. 


For the frame I nested outer three dies from Spellbinder's Large Classic Ovals. The paper collection that I used is Sunrise Lily Collection and Birds and Blooms Collection. The painted and fussy cut images are layered using glue dots. 


A cl;ose-up showing different layers of poppies. 


I added a double knot bow at the base of the arrangement to enhance the beauty of the card little more. 


That's all for today's card. 

If you are new and hunting for various craft supplies at best prices in India,you can contact Meetu Aggarwal  or check her website Here  and Priya Sivaraj or check her website Here 

Hope I m able to inspire you with my creations. If you like my work and want me to see reach my goals as a Dt with Heartfelt Creations, do leave some love n vote for me. Your votes are important for me. You can check all my three creations that I submitted for semifinals in the photograph below:


For more detailed pictures of Desk Calendar cum Mini Album....Click HERE
For more detailed pictures of Flip Fold photo Booklet .....Click HERE
For more detailed pictures of card Let Love Blooms.....Click HERE

And, to vote click HERE 


Thanks for dropping by. 
Happy Crafting !!

Friday, February 19, 2016

Desk Calender Cum Album

Posted by Rajni Chawla

Hi all...

Flowers always make people feel better, happier and more helpful. They are sunshine,food and medicine for all souls. Its from my childhood that I always got fafscinated to Sunflowers. Their fresh colors, tall high  attitude has always inspired me a lot. 

Keep your face to the sunshine and you can not see the shadow. That's what Sunflowers do...!!

Its a beautiful quote by Hellen Keller, that I always loved.

If I were a flower.....I would be a sunflower. 
To always follow the sun, turn my back to darkness,
Stand proud, tall and straight even with my head full of seeds. 

Isn't it what we all should be like??
Off course YES !!
I am always in love with Flowers.....spcly Sunflowers. 

Today I will be sharing 3 projects that I created for initial submission of Heartfelt Creation Dt application form. I am happy that I was able to give my best and achieved the results what actually I expected before starting the projects. Since the projects have lots of details, I have made three separate posts on my blog. As I said I always get inspired by sunflowers,the first project I created is with sunflowers only. I feel they are lucky for me always. 

PROJECT 1 
DESK CALENDER CUM ALBUM


The calender has 12 pages. Each page has calender on one side and flip flod and belly band albums to hold pictures of various sizes on other side. Pls refer to the close-ups to study the details. 


Suplies from Heartfelt Creations used :-


Other supplies used :- 
Die- cutting machine, glue dots, glue, fussy cutting scissors , Brushed Corduroy Distress ink, blending tool and blending foam, trimmer, score board, magnets, tacky tape, stickles, clear rock 
candy glitter, clear diamond dust , acetate sheet, black card stock, black chip board, double sided adhesive sheet. 


Instructions... 

Flowers and Leaves : 

The flower image is stamped using Plum Archival inks with HFCClassic Sunflower Cling Stamp and then alligned with its co ordinating die HFC Classic Sunflower Die and cut through die cutting machine. The leaves are stamped from two sets of stamps, HFC Open Leaf Stamp and HFC Classic Leaf Stamp with Fern Green Archival ink and then cut through die cutting machine using HFC Classic Leaf die. since we have to mist the die-cuts with water, the stamped inks has to be permanant. For me Archivals work best. Color the flower petals with Harvest and shade a little with plum archival on edges. Color leaves with Color Box lime Pastel and Color box Guocomole on edges. For flower construction follow the video by Emma Lou Beechy HERE. Once the flowers and leaves are ready just dust them with clear rock candy glitter and clear diamond dust using glossy accent. 


Base of the Calender : 

Base of the calender measures 10 1/2" by 8 1/2" . Cut 2pcs of black chipboard of the same size. Mat designer paper from Classic sunflower Collection leaving 1/8th of an inch on all sides. Cut one piece of a black card stock and make a hinge of 1 1/2" x10 1/2" . Score at 3/4". Join both the chipboards with this hinge on top. To make the calender stand stable on the desk attatch it with a lower hinge. The lower hinge measures 6" by 10 1/2 " . Score at 3/4", 1 1/2", 2 1/4", 3", 3 3/4", 4 1/2",
5 1/4" . Crease on all the score points and make mountain and peak hinge. Attatch the same to the lower part of both the chipboards. Decorate the front and back with textures and heat embossing powders. Make two holes on both the sides of calender leaving equal distance for the rings with the help of crop a dile. 

For the pages : 

Cut 12 pages from black card stock of 7" by 5 1/2". Adhere 1 1/2 " by 7" strip of double sided adhesive sheet. Align only the edge die from HC Regal Border Die and cut through die cutting machine. Detatch extra from both sides with scissors. Now cut designer paper 1/8 less from all sides for the base pages. Allign both edge and border dies and run through big shot machine. Remove sticker sheet from the base card and set the designer paper on top. Dust the adhesive space with glitters. Burnish it with your fingers for extra sparkle. Prick two holes allingning the main calender base. 
Decorate all the pages as per your style. 


Flower cluster on the calender: 

I have used black Die cuts from HFC Rain Drop Roses die as a base fo flowers . Layer few leaves and assemble few flowers using glue to form a flower cluster on bothsides of calender. 


Here are the pictures showing all details. 

Front of the calender showing album pages. All pages have different presentation of flip folds or belly bands to hold pics. Few can hold upto 7-8 pics on one page. 


Its calender on the back side. 
Simply designed using HfC Raindrop Roses Diecuts and fussy cut flowers. 


Close-up of calender showing all the pages together. 
Can you see how I have fussy cut the image and made a window for my flipfolds. Clear rock candy glitter is making the image pop more. 


Look at that glitter...beautifully popping behind HFC Regal Border Die cuts. 
GORGEOUS!!
Also check the fussy cut flowers. I am little hand fisted crafter...will never throw a single bit of paper. If a smaller part of an image is cut while layering or matting, I will save that and use it as an embellishments for my projects. 


Different pages have different belly bands to hold tags. 


Few more belly bands. 


Many of the pages  have flipfolds. All have magnetic closure or ribbons to save the pictures from falling. 


More flipfolds...


All calenders out.....


Front side of the calender without flaps....


Backside .....without flaps. 


Little more close-ups of flower cluster. 


Beautiful flutter...


Close-ups of flowers....


And thats all...

Sorry for such a long post. But I really enjoyed sharing the beauty of my project from all the angles. 

So....this is my first project for submission. Will be posting 2 more today. 
I would appreciate if you leave some love if you liked my creation. 
Thanks for stopping by. 

(( Hugs ))